In this tutorial I’ll explain how to control Luxaflex PowerView shades directly via the HTTP API of the Hub. I hope it gives insight on how the PowerView Hub works, you can and should adapt it to your own needs.
1. Get the PowerView Hub IP address
Expand to see how to get the current IP address of the PowerView Hub
You should use a fixed IP for your PowerView Hub if you want to control it directly via HTTP.
This way the IP address does not change if the Hub or your router is restarted. You can configure a fixed IP address via the app. Make sure you don’t pick one in the DHCP range of the router. Another way is to configure your DHCP server (in your router) in such a way it will always give the MAC address of the Hub the same IP address. Details go beyond this guide, but please ask if you need help.
To get the current IP address of the PowerView Hub (or configure a fixed one):
Go to menu:

Select Hub:

Select the Hub you want to use:

If Safe mode is on, turn it off

Go to the Hub details:

The IP address is displayed:

At ‘Statische IP’ you can configure a static IP address for the hub, in case the hub is wired via Ethernet.
Go back and don’t fotget to put safe mode back on again if you disabled it.
2. Get the shade id of the Luxaflex product you want to control
Expand to see how to get the shade id of the product you want to control
For the next steps it is very handy to use Chrome and install the following extension. You can remove them again after you’re done with this part. They are not needed to make it work, just to make life easier for developers.
Hasher, can do a lot, we will use it to decode base64:
https://chrome.google.com/webstore/detail/hasher/kignjplbjlocolcfldfhbonmbblpfbjb/related?hl=en
JSONView, to pretty print JSON documents:
https://chrome.google.com/webstore/detail/jsonview/chklaanhfefbnpoihckbnefhakgolnmc
Now go to http://[ip address of your powerview hub]/api/shades
In my case this is http://192.168.178.45/api/shades

If you have multiple shades, you can find the shade by name. The names are base64 encoded.
To copy the value, right click on the encoded name, select JSONView from the context menu and select copy value. Open Hasher, select the ‘Encode’ tab and paste the base64 value in the input field:

Now at the Base64 decode output, the readable name is visible.
So now I know if I want to control the ‘Eetkamer erker’ shade, I should use shade id 331.
3. Control a shade via flows
3.1. Install prerequisites
HTTP Request Flow Cards
https://apps.athom.com/app/com.internet
Better Logic
https://apps.athom.com/app/net.i-dev.betterlogic
3.2. Add Homey Logic variables
Go to the ‘More’ (Meer) tab and select Logic (Logica):

Add a variable for the shades URL and use the IP address of your hub (see above on how to get it):
Don’t forget the ending slash /

I tried to use only the IP address as variable, but due to an anomaly in Homey and/or the HTTP request cards app, I was not able to compose a working URL by combinding text and variable tags
Add a variable for the shade id (see above on how to get it):

Add a variable for the position kind:

Shades can have two positions, postion1 is always the main (lower bar) of the product and has a posKind1 of 1. For top-down shades also position2 is available with a posKind2 of 2, which is the upper bar of the product. For Venetian blinds and other products with a tilt functionality, position2 is available with a posKind2 of 3 to set the tilt position of the product. For now I am adding only one position for a shade, but you should be able to add a second position yourself after finishing this tutorial, but please ask if get stuck while doing so.
Overview of the added variables:

3.3. Add a Better Logic variable for the shade position
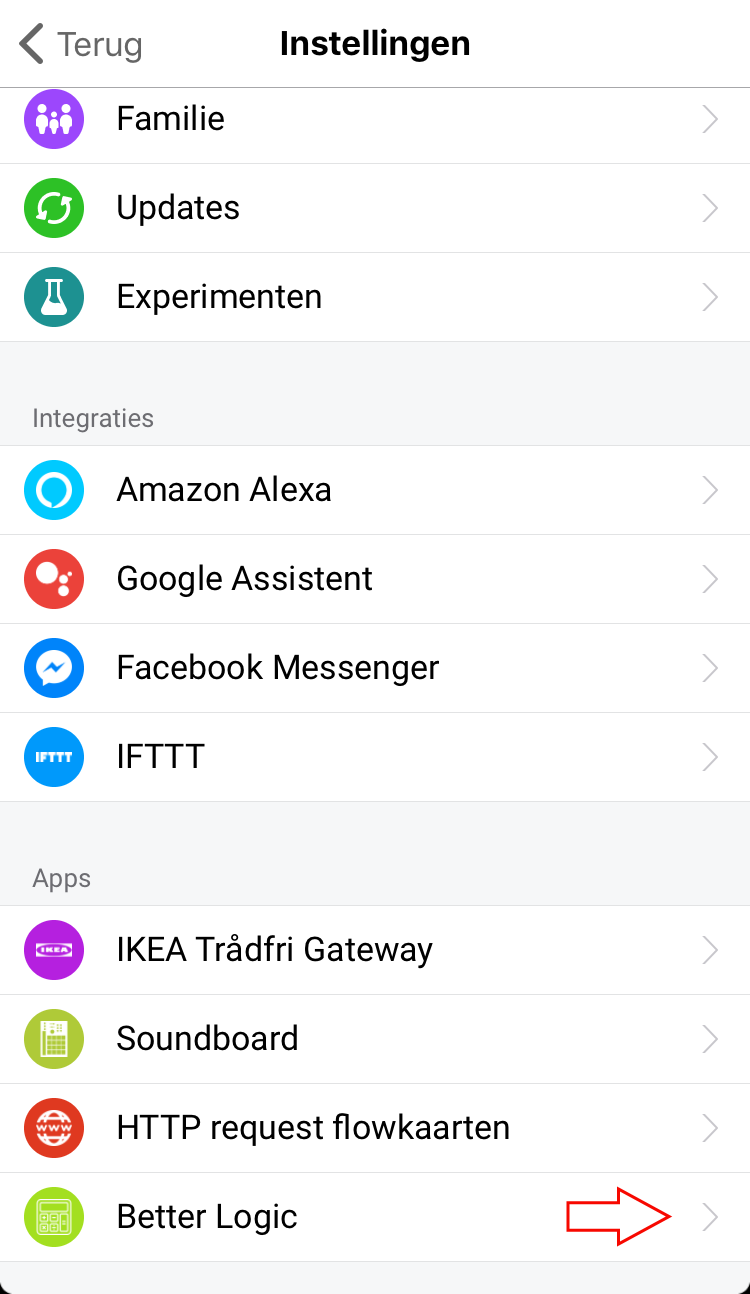
Go to the “More” (Meer) tab and select settings:

Scroll down to Better Logic and select this option:
Add a numeric variable and give it recognisable name put the value at 0.
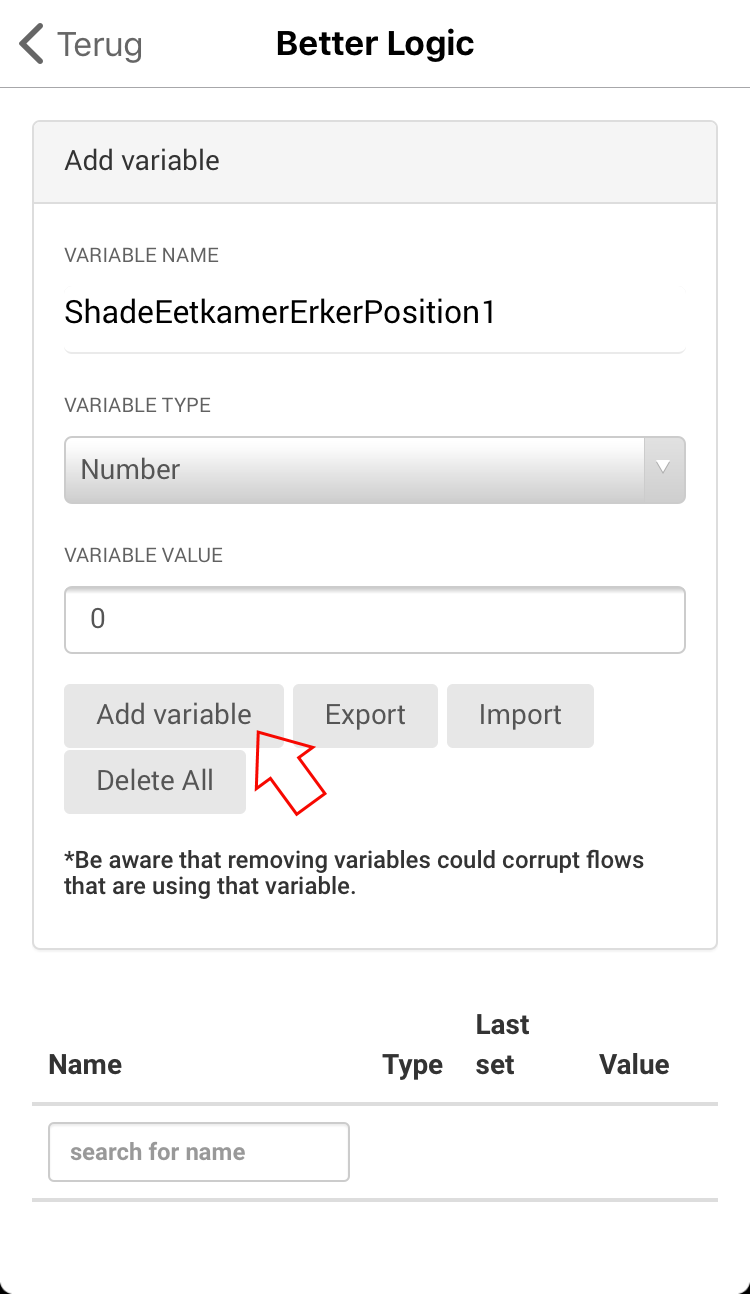
The variable is added (you might have more variables already):

Expand to read why I am using a Better Logic variable for the shade position
Why I am using a Better Logic variable for the shade position
The real position of the shade can get out-of-sync with the position known in Homey. This could be solved by reading the position from the shade in the hub, but it is not always updated in the hub, for example if it is operated via a PowerView Pebble remote and forcing a shade to update itself takes time and drains the battery. I can live with not having an up to date position in Homey, but if I want the shade to go to for example position 0, it should go to this position, regardless of the internal Homey position of the shade.
Homey Logic variables have no trigger that triggers if a variable is set, even it if is is set to the same value. So in case the last known shade position in Homey is 0 (closed), but the shade in real life is at position 65535 (open), setting the position variable to 0 (again) does not trigger a flow to update the shade. Better Logic supports a ‘variable is set’ trigger which triggers even if you set s variable to the same value it already had.
Why I am not using a Better Logic for all variables
First I want to use as much of the standard Homey functionality as possible.
Second the variable editor of Better Logic does not work well (at the time of writing) on a small mobile device like a smartphone, editing a longer text variable like the shade URL is near to impossible for example.
3.3. Create a flow to set the shade position
This flow triggers as soon as you set the position variable created for the shade and updates the shade.
Create a new flow as below, which is named ShadeEetkamerErkerSetPosition1 in my case.
If a Better Logic variable is set:

If detail:

Then HTTP request cards PUT JSON:

Then detail:

The JSON is:
{"shade":{"positions":{"posKind1": (ShadeEetkamerErkerPosKind1) ,"position1": (ShadeEetkamerErkerPosition1) }}}
Texts between braces () are Logic tags
Editing these kind of complex values could be improved upon a bit
3.4. Create a flow to stop the shade
This flow can be started to stop a moving shade.
Create a new flow as below, which is named ShadeEetkamerErkerStop in my case.
If this flow is started:

If detail:

Then HTTP request cards PUT JSON:

Then detail:
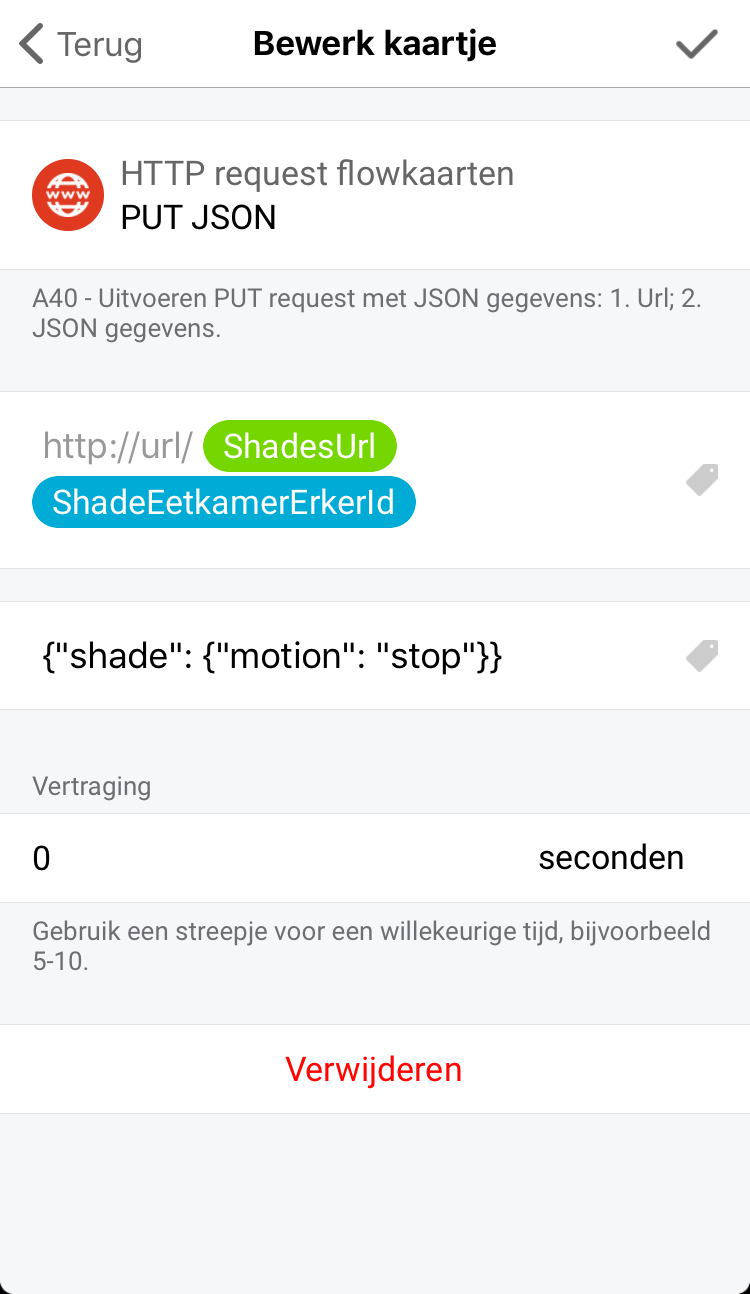
The JSON is:
{"shade": {"motion": "stop"}}
3.5 Conclusion
Now we’re all set to control the shade from other flows.
You can set the ShadeEetkamerErkerPosition1 Better Logic variable to set the position from 0 (closed) to 65535 (open). The ShadeEetkamerErkerStop flow can be triggered to stop a shade while it is moving.
Apart from stop, the following motion commands can be used: up, down and jog.
I am not using up and down, because settings the position to 0 for closed and 65535 for open can be used as well for this, but you could also create separate up and down flows.
I did not find any commands for tilting shades or controlling the upper bar of top-down shades, but it could be they are not even available.
4. Create a Virtual Device for a shade
Even nicer is to be able to use a virtual device
4.1. Install prerequisites
Virtual Devices
https://apps.athom.com/app/com.arjankranenburg.virtual
4.2. Add a virtual device
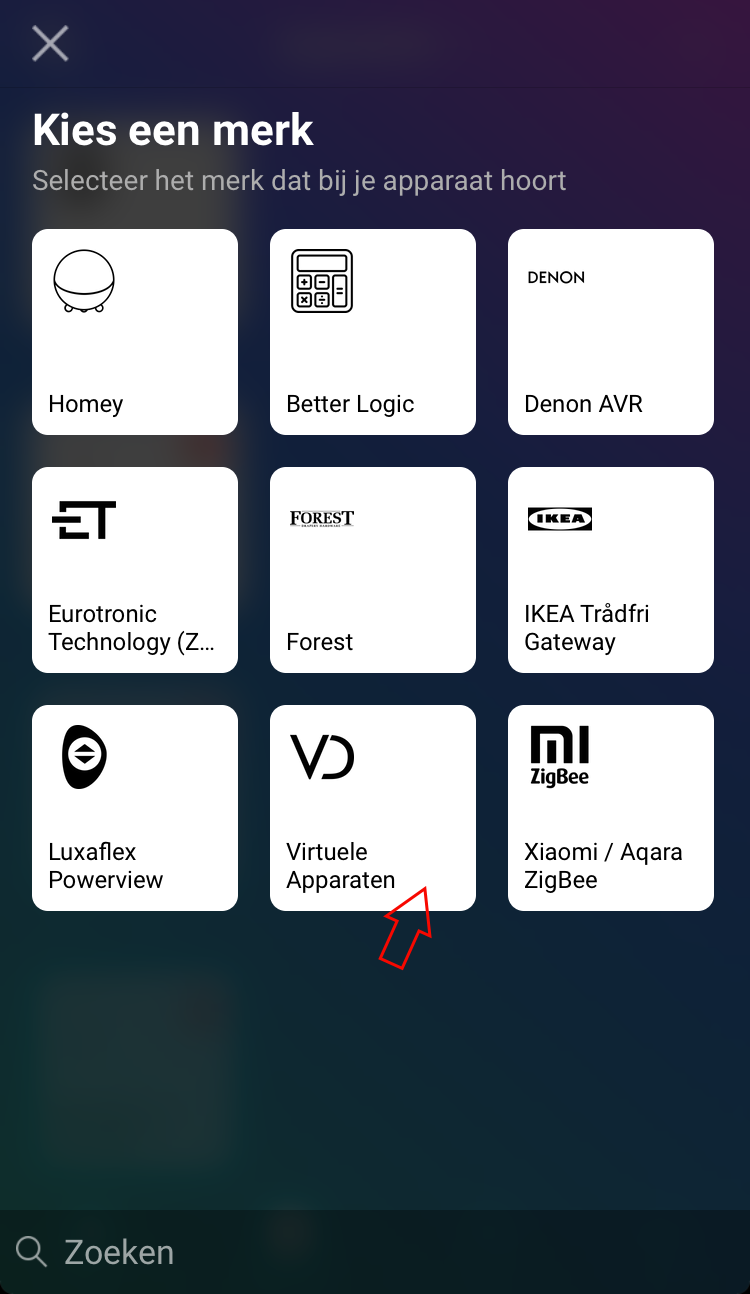
Add a device and choose Virtual Devices as brand:
Choose Device:

Name your device (give it a nice readable name):

Choose the capabilities (for now, to keep things simple, I choose only dim and up/stop/down):

4.3. Create a flow for the dimmer slider
The Luxaflex shades have an integer position ranging from 0 (closed) to 65535 (open). Homey handles shades just like light bulbs with decimal values ranging from 0 (closed/off) to 1 (open/on), so 0.5 is half open. If you want to control the shade via a virtual device, the Homey 0…1 ‘dim’ value needs to be converted first, before it can be set on the shade.
Create a flow as below:
Make sure to name it so you can distinguish it from the set position flow made earlier (which is not directly tied to a virtual device). I am naming it Luxaflex Eetkamer Erker Dim.
If the dim level of the Virtual Device is changed:

If detail:

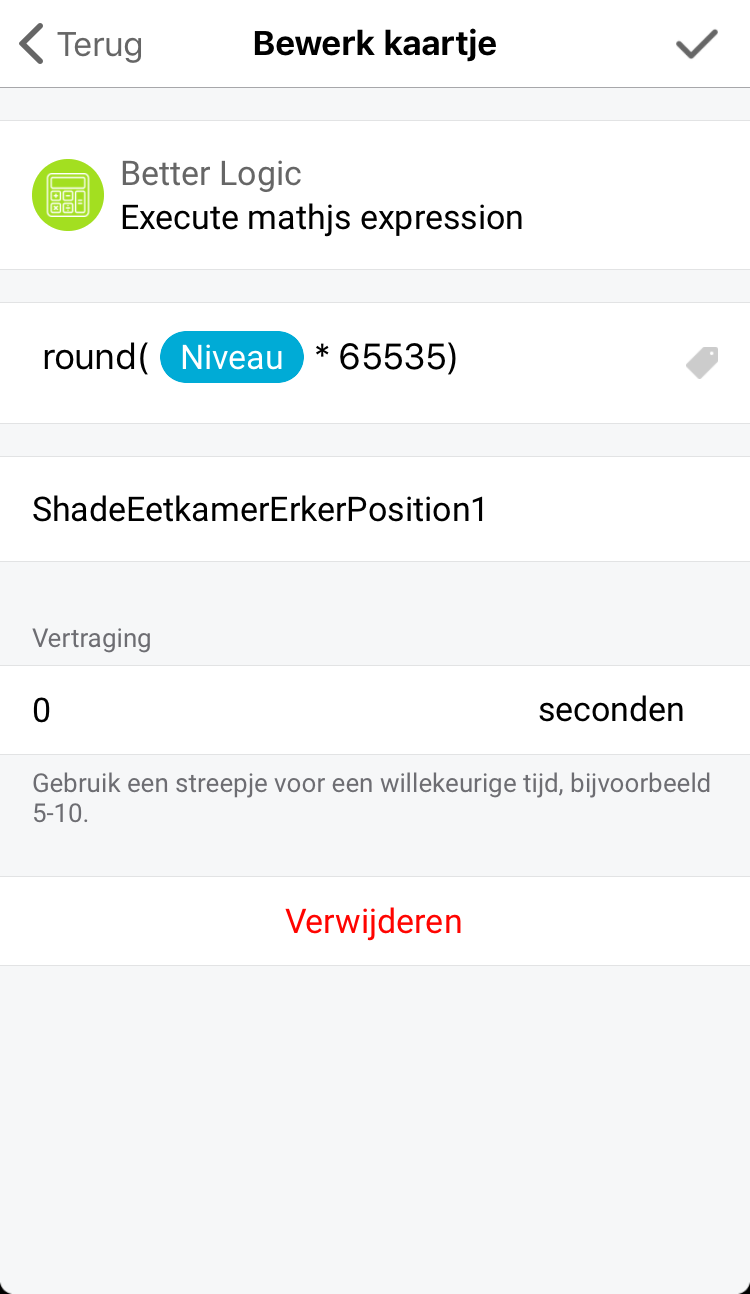
Then use Better Logic ‘Execute mathjs expression’ to calculate and set the new postition1 value:

Then detail:
4.4 Create a flow for the stop button
Make sure to name it so you can distinguish it from the stop flow made earlier (which is not directly tied to a virtual device). I am naming it Luxaflex Eetkamer Erker Stop.
If the state of the Virtual Device is changed to ‘stop’ (stil):

If detail:

Then trigger the stop flow made earlier:

Then detail:

4.5 Create a flow for the up button
Create a flow as below. I am naming it Luxaflex Eetkamer Erker Omhoog.
If the state of the Virtual Device is changed to ‘up’ (omhoog):

If detail:

Then set the Better Logic variable for the position1 to 65535:

Then detail:

4.6 Create a flow for the down button
Create a flow as below. I am naming it Luxaflex Eetkamer Erker Omlaag.
If the state of the Virtual Device is changed to ‘down’ (omlaag):

If detail:

Then set the Better Logic variable for the position1 to 65535:

Then detail:

4.7 Conclusion
Here is an overview of the created flows:

Now you can control the shade via the virtual device.
Long-press the button of the device in devices screen to access the dimmer slider and swipe to the right to access the up/stop/down buttons.
The device (long-press to access settings:

Dimmer:

Up/stop/down:

That’s all for today.
If you have any questions… Ask!
