Did you also type in the port 5005
It looks like it is already preset in the app Connection Settings under the IP adres, but you still have to type it in.
After that it worked for me, all speakers were found
Don’t think it matters what he has entered, if he gets a 404 page it means the docker image doesn’t work as expected.
@Henk_Renting did you check the docker image? If need any help with it, maybe we can help?
That would be great @Martijn!
I am sure the problem lies in the Docker image too.
When the container is started, it runs for a few seconds and the gets automatically restarted. Over and over again.
When I try to setup the folders as you mentioned in your post below:
I:
- select the image
- choose edit
- choose volume
- click add folder
- go to docker/sonos/settings (folders which I added) and click Select
But then… I cannot type app/settings, as it says it is an incorrect value

![]() Any idea?
Any idea?
I’ll try to show how I did it:
Step 1: Add Registry:
You already did this step, but for the whole story, I think it is important to have the correct registry
Open Docker, go to registry and search for “chrisns”.

There you see the ‘docker-node-sonos-http-api’, click this and hit the ‘download’ button. Leave ‘latest’ and hit OK.
The image will be downloaded now.
Step 2; Create container
Go to ‘image’ and search the docker-node-sonos-http-api image. Click it and hit the ‘launch’ button:

Step 3; Configure container
Give the container a meaningful name, or leave it as is, but that’s up to you.
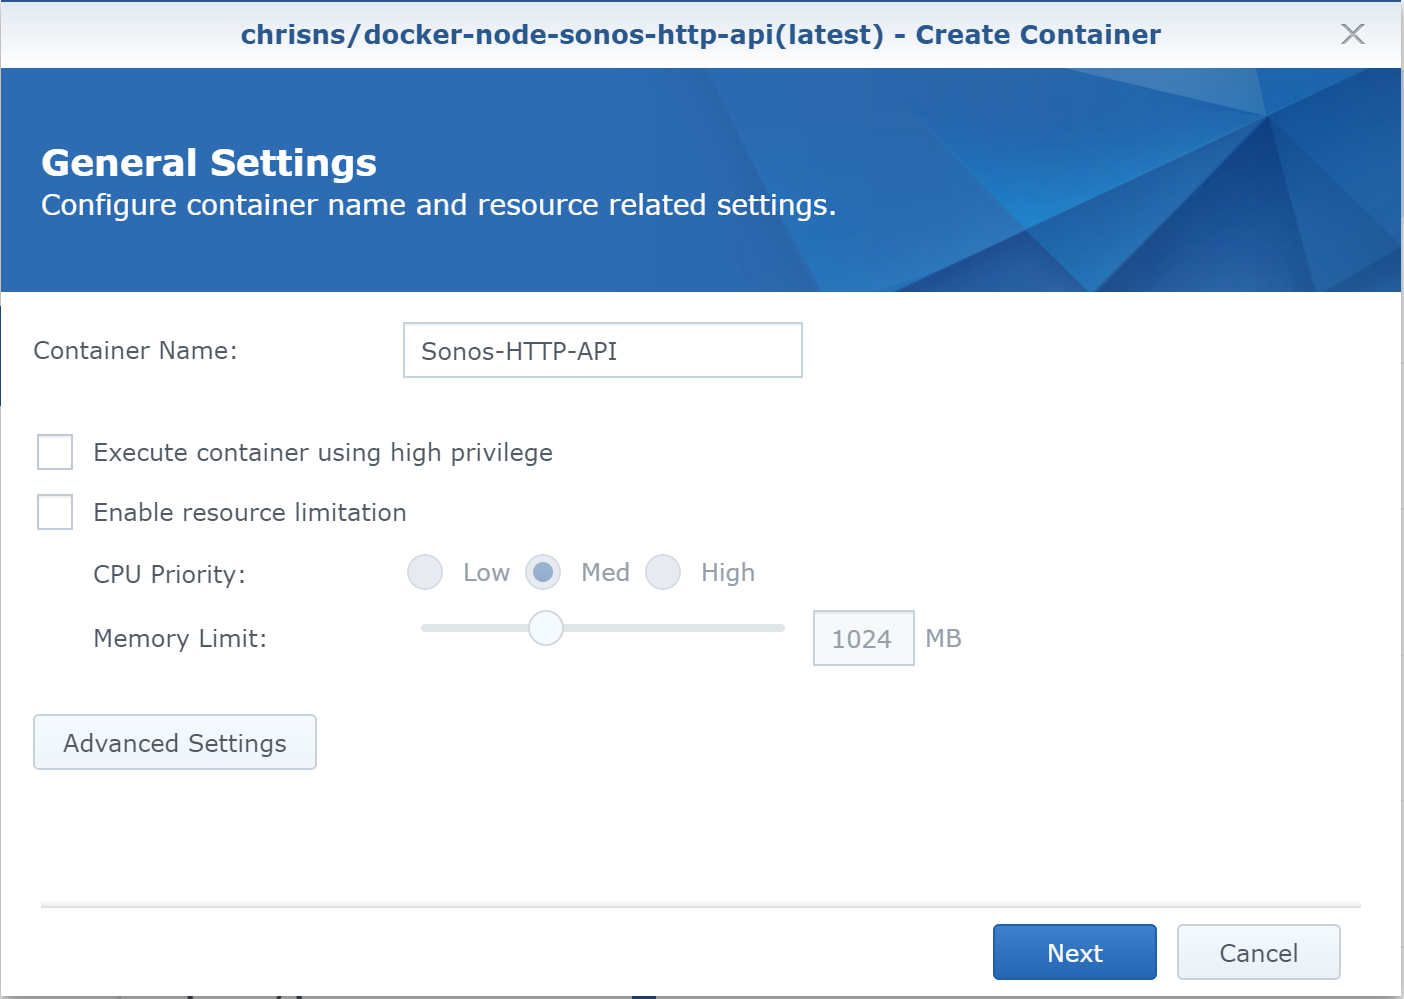
Hit the ‘Advanced Settings’ button.
On the ‘Advanced Settings’ page, check the ‘enable auto-restart’ option.

On the ‘volume’; this is where the volumes get created, but only once. The reason ‘we’ do this is to keep persistence across docker image updates. What we basically do is expose local directories on your NAS to the docker container for it to use these directories and files inside the container.
According to the manual we need to have 4 folders:
- clips
- settings
- cache
- presets
If these are not present, we are going to create these during this setup, if they are present, then just select them and do not create them.
Hit the ‘add folder’ button:

Browse to the folder you want to create the ‘new’ folders in. And select it (!DO NOT click the select button just yet). What I typically do is create a new folder with a name corresponding to the docker image and create subfolders inside it.
Click the ‘create folder’ button and give it the first name of list above (eg clips). When the folder is created hit the ‘select button’.

The folder will be added to the list:

Now we have to add a mount path, these are the following:
- clips → /app/static/clips
- settings → /app/settings
- cache → /app/cache
- presets → /app/presets
Repeat these steps to create / select all folders, it should look like the following:

Go to the tab ‘network’ and check the ‘Use the same network as Docker Host’. This makes sure the image uses the ‘ports’ on host (your NAS) also called the ‘host’ network. Be sure there is nothing else running on port 5005, which is used by this image. If port 5005 is already in use by another application / docker or whatever, the image creation will fail.

There are no other settings needed, so hit the ‘Apply’ button on the bottom of the screen.
Now if everything is set up, hit the ‘next’ button:

On the Summary page, all settings are displayed again for a final check, hit ‘apply’ if you agree with hit. And since the checkbox is checked to start the container after hitting ‘apply’, it should now start. Uncheck it if you want to do the final steps too.

The final steps:
- Open powershell (or terminal if using mac) window and type “ssh username@nas-ip” (replace username with your admin account and the nas-ip with the IP address or hostname of your NAS device).
- Enter yes at accepting the key
- Enter your password
- enter the command: “sudo su -” The dash sign on the end is important. Now enter your password again.
- Be sure the container is not running and change to the container directory, you have created it during the previous manuel. (cd /volume1/docker/sonos for example)
- Enter the following commands:
curl https://raw.githubusercontent.com/jishi/node-sonos-http-api/master/presets/example.json > presets/example.json
echo {} > settings/settings.json
- type exit and exit again and start the container.
More info can be found on GitHub - chrisns/docker-node-sonos-http-api: Docker wrapper for https://github.com/jishi/node-sonos-http-api.
There you go.
Hopefully it works for you.
//updated the steps to include the last (optional) steps too
Hi Martijn,
That is one extended and clear manual! Thanks!
Unfortunately the container keeps (crashing and) restarting… 
- So I have: uninstalled/remove the container and all settings from Docker.
- Uninstalled Docker, checking that all containers have to me removed as well
- Restarted my Synology
- Installed Docker
- Followed your instructions, just as you wrote
But no luck. The container keeps restarting…
I am afraid something else is wrong here…

@Ludvig ^^
Downloaded 2.0.1 from community app-store and get this when searching for speakers.

Docker running on a Synology and guide followed from Martijn
Mm have sen this before. Don’t know why. Uninstall the app and install it again. Solved it for me. @MadMonkey do you know why?
Synology is complaining about a missing settings.json?

Mm that’s because you can setup a custom configuration in node-Sonos. Have custom zones etc. that should not be the problem here. Sounds like a homey issue. Did the reinstall help?
Yes it did, thnx
Sweet. Feels like some kind of a Homey issue. Had the same issue and the same fix worked for me.
Yes there is probably something else wrong, but who knows. What you could try is to run the docker with elevated rights so it runs under root account.
Do this by stopping the container and hitting the edit button. Over there you can check the box at execute container at high privilage, and hitting the yes button at the warning:

You also could try and create both the settings file and the example.json.
- Open powershell (or terminal if using mac) window and type “ssh username@nas-ip” (replace usename with your admin account and the nas-ip with the IP address or hostname of your NAS device).
- Enter yes at accepting the key
- Enter your password
- enter the command: “sudo su -” The dash sign on the end is important. Now enter your password again.
- Be sure the container is not running and move to the container directory, you have created it during the previous manuel. (cd /volume1/docker/sonos for example)
- Enter the following commands:
curl https://raw.githubusercontent.com/jishi/node-sonos-http-api/master/presets/example.json > presets/example.json
echo {} > settings/settings.json
- type exit and exit again and start the container.
Hopefully it works, if not, i’m out of idea’s ![]()
Thanks a lot the useful and comprehensive step by step guide @Martijn_Hoogenbosch the container run with no problems from the first try.
On the other hand, the app would not find my speakers. Neither uninstall/install nor restarting the app fixed it.
In the end a PTP sorted out. Hope this would help somebody.
The app only finds speakers from my S2 app. Is it somehow possible to also discover the speakers on my other S1 app?
if you go to http://IP:5005/zones, do you see your S1 speakers listed? If not, the app won’t find them.
It just S2 speakers there.
But there must be something, like filling some stuff in the settings file maybe?
Mmm… cannot find any on the readme, https://github.com/jishi/node-sonos-http-api, infact I only find S2 seems to be still supported… so they didn’t even know for sure it S2 was supported. It probably does a upnp / network scan and it probably has found your S2 system first. But that’s just a guess

I can only find HouseholdControlID in the url they mention, but don’t know what to do with this in the settings.json…good luck 
