Maybe you have misspelled your boolean variable in the node function, can you share your flow or check it ? You can also try to switch the light ON/OFF, but not with the Dashboard, maybe with Homey, and check if you see true/false in the Node-Red debug.
Sorry guys, but this is a real noob question. I tried to find my answer somewhere among the the 400+ replies here but I didn’t manage. I just setup Node Red on Docker (Synology) today, created a MQTT broker on the same platform (Mosquitto) and succesfully setup MQTT Hub and Client on Homey.
I tested with Satoer’s flow (MQTT Receiver to output debug), and actually I got a hit right away. But in the debug log it looks like it only displays a certain kind of devices, like temperature sensors and stuff like that. I can’t find any lights or other devices (yes, the MQTT hub broadcasts all devices)
Any ideas what went wrong or how I can troubleshoot?

Switch on and off the lights inside Homey, do you see any debug information?
Still experimenting. The layout is still far from finished, but I have some nice functionality already:
Some temperatures. The background colors of the temperatures change acording to the temperature. For the bedroom and outside temp, even the icon changes (empty meter up to full meter).
Modes. The buttons work and only the activated mode is blue, te others transparant.
Locks. The icons are closed for closed locks and open for open locks. Background color also changes.
Gas/power. Used power and gas from today
Roborock. State of the vacuum cleaner is stated and i can start/stop it.
Still a lot of work to do. But thanks to this topic it’s getting better bit by bit.

How did you do that the symbols change when the status changes?
You can change the on and off icon from switch nodes:

Hi Satoer! I got that fixed, sorry for disturbing you! I will try to catch up on every post, this is really interesting!!
Hi all,
Such a lengthy but very intersting topic. Started to learn about Node Red and MQTT a few days ago and really love it 
One question: Let’s assume I put a button on a dashboard and want to trigger a flow with this in Homey. Is there any nice way in doing it? Really sorry if I missed it in the long thread.
Johannes
The TEST button with the open lock is a switch. That one works like @Satoer says. But you can’t change the background color of a switch and the font of the text looks a bit diferent. So I use buttons instead of switches now. For example with the “Keukendeur” I use a Function with this code:
var color;

if(msg.payload === "true"){
 color = "#FFC815"
 msg.ui_control = {icon:"fa-2x fa-unlock", tooltip:"Deur open"};
}

else{
 color = "rgba(255, 255, 255,.08)"
 msg.ui_control = {icon:"fa-2x fa-lock", tooltip:"Deur dicht"};
}
msg.background = color;
return [msg];
Or import this in to node-red:
[{"id":"a65e9076.3be4c","type":"mqtt in","z":"7b4023c5.1e24fc","name":"MQTT HA Voordeur","topic":"homie/homey-topic/hal-deur-plus/alarm-contact","qos":"2","datatype":"auto","broker":"649f9a36.29ece4","x":130,"y":1900,"wires":[["d55af3ce.c3078"]]},{"id":"94484bae.f300f8","type":"ui_button","z":"7b4023c5.1e24fc","name":"","group":"ba312333.3bdaf","order":12,"width":0,"height":0,"passthru":false,"label":"HA Voordeur","tooltip":"","color":"","bgcolor":"{{msg.background}}","icon":"{{msg.icon}}","payload":"","payloadType":"str","topic":"","x":730,"y":1900,"wires":[[]]},{"id":"d55af3ce.c3078","type":"function","z":"7b4023c5.1e24fc","name":"Kleur en icoon","func":"var color;\n\nif(msg.payload === \"true\"){\n color = \"#FFC815\"\n msg.ui_control = {icon:\"fa-2x fa-unlock\", tooltip:\"Deur open\"};\n}\n\nelse{\n color = \"rgba(255, 255, 255,.08)\"\n msg.ui_control = {icon:\"fa-2x fa-lock\", tooltip:\"Deur dicht\"};\n}\nmsg.background = color;\nreturn [msg];\n\n\n","outputs":1,"noerr":0,"x":380,"y":1900,"wires":[["94484bae.f300f8"]]},{"id":"649f9a36.29ece4","type":"mqtt-broker","z":"","name":"MQTT server Jeroen","broker":"192.168.178.129","port":"1883","clientid":"","usetls":false,"compatmode":false,"keepalive":"60","cleansession":true,"birthTopic":"","birthQos":"0","birthPayload":"","closeTopic":"","closeQos":"0","closePayload":"","willTopic":"","willQos":"0","willPayload":""},{"id":"ba312333.3bdaf","type":"ui_group","z":"","name":"Group 3","tab":"bf9cdcc.4e7c92","order":3,"disp":false,"width":"3","collapse":false},{"id":"bf9cdcc.4e7c92","type":"ui_tab","z":"","name":"Startscherm","icon":"home","order":1,"disabled":false,"hidden":false}]Can you explane to me how to do this? I look around in Node Red but have no idea where to paste the code you have shared.
Hi @Jan_Willem_Visser
It’s explained in the first post of @Satoer, here : Node Red: A widget based dashboard working with Homey trough MQTT
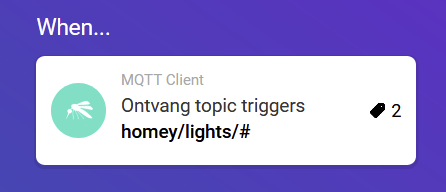
I don’t think I explained this in the first post. There are several things how you can accomplish this. Create a virtual button that activates the flow. (by MQTT-ing the virtual button). Or start a flow directly with a MQTT Client trigger. You can create any topic you want, and the flow gets triggered if you send a MQTT message to it.
Hi Arnold, there is also another option for this static screens.
I have 2 tablets here, 1 ipad and 1 samsung android.
They have different screen layouts (4:3 / 16:10)
If you put this code in a header node the screen width is limited to 1000px. But can easily be changed.
[{"id":"2db7537e.418f3c","type":"ui_template","z":"9b29517d.8821a","group":"ce3d2b3e.1755e8","name":"Breedte maximaal 1000px","order":4,"width":0,"height":0,"format":"<style>\n .masonry-container {\n max-width: 1000px;\n }\n</style>","storeOutMessages":true,"fwdInMessages":true,"templateScope":"global","x":750,"y":140,"wires":[[]]},{"id":"ce3d2b3e.1755e8","type":"ui_group","z":"","name":"Energie","tab":"a74c5fa4.31437","order":1,"disp":true,"width":"4","collapse":false},{"id":"a74c5fa4.31437","type":"ui_tab","z":"","name":"Overzicht","icon":"fa-home fa-lg","order":1,"disabled":false,"hidden":false,"info":"<title>Thuis</title>"}]
This works then of course also on a PC.

Great - thank you. Again this is the point where we need more than one trigger for a flow in homey. 
Hallo,
Can someone tell me what variable I have to use for windspeed in kmh and m/s?
The variable I use now is does not give the right speed.
var msg = {
“payload”: {
“speed”:Math.round(Math.random() * 60)
}
}
return msg;
Thank you.
Hello Tangodelta,
I am interested in displaying the owntracks map on my dashboard. can you detail how you proceeded?
Thanks
Can you tel me where u paste the code? I have no idea whare ik heave to paste te code 
Its actually not a Homey thing…

1 Like
