Hi everyone,
in this tutorial I will tell you about logic variables and you will learn:
- how to create a variable
- the different kind of variables and;
- their properties and limitations
- some uses cases of the different types
First, let’s take a look at what Athom gave us to work with, shall we? In your app, go to the ‘more’ tab and hit ‘logic’. I already have some variables in my app, so my screen looks like this:

You’ll notice I made a blue mark on the printscreen, highlighting three different signs. Those three signs represent the three different types of variables you get in Homey. The types you get are:
- Yes/No
- Number
- Text
Before we continue, please remember that the variables in Homey will never be a constant variable. Any flow you create in order to adjust a variable, will alter the state of the variable. I am aware that this might be confusing (for developers/programmers) because the ‘const’ variable in Javascript does not allow for a new value to be assigned. I just learned this recently, don’t judge me.
Yes/No
The first one is the most limited one in terms of capabilities. This variable can only contain the values ‘yes’ or ‘no’. When someone on this forum talks about a boolean, they are talking about this specific variable. This variable basically evaluates to a true or false.
Contrary to what you might expect, because this variable is limited in it’s capabilities, it’s imho the most usefull variable.
This variable is most commonly used for a few things:
- tracking the state of a device
- tracking whether a flow has run and;
- stopping that same flow from running again
We’ll dive into that later. Let’s first take a look at the other types
Number
This variable can hold any given number, but will never hold anything other than a number. When I say any given number, I absolutely mean any given number. Of course you can give it the value 1 or 5, but 56479236 is also a possibility. And, as you might know by now, I try to keep positive. But if you’re feeling a bit down, you can always post a negative value, such as -6. Also, if you’re feeling funky, you can get fractional. Try adding a variable with the value 0.25.
adding a variable
You can add a variable by hitting the + sign in the top right corner of the logic screen I pointed out earlier. Just fill in the name, assign a type to the variable and give it an initial value. Great! You just added a variable to your Homey.
If you type 0,25, Homey will automatically adjust this to 0.25. Please keep in mind that you cannot add a percentage, like 75%. Homey will delete the %-sign and you’ll end up with 75. That’s not entirely want you wanted. When you want to use percentages, simply type 0.75. That also happens to be Homey’s way of showing a percentage. Let’s take a look at the volume my Sonos system is currently playing at:

It’s currently playing at 0.07, or 7%.
The number variables come in handy when calculating (but you already guessed that), which allows us to:
- track (and sometimes set) values such as light intensity, volume, battery level and energy usage
- track weather conditions (temperature, pressure, humidity, luminosity and such) and act upon these conditions
- create a fictious state and track it
We can perform almost every mathematic trick with these variables you might need in your search for home automation. I will give a few examples later to demonstrate. Let’s first talk about the last type of variable. And if you’re a more experienced Homey user, I recommend that you install the ‘better logic’ app created by Patrick Sannes:
Text variables
These variables are quite versitale, in the sense that they can hold just about any value. You’ll generally want to use this variable in order to store and re-use a piece of text, but you can also store numbers in this variable. Some common ways of using this type is:
- Date & time (yes, the date and time are not stored in a number variable)
- General description of the weather (e.g. clouds)
- Artist, album and track information (from Spotify or similar)
- The trashcan reminder https://apps.athom.com/app/com.trashchecker
- storing a URL
You probably want to dive into those use cases! But first, let’s see what type of cards you get in the different parts of a flow (remember, we have the ‘when’, ‘and’ and ‘then’ part). Or just skip this and scroll down to the use cases part, that’s cool to.
when
There are two different triggers:
- When a variable has changed
- When a webhook was received
The latter is somewhat more difficult and will perhaps be subject of another tutorial. For now, just remember that a changing variable is a trigger. This can be any of the variable types (text, number and boolean). I don’t expect people to use this often, because changing a variable is typically something you do using flows. So whatever you want to automate when a variable has changed, you can generally also add to the ‘when’ part of the original flow that changed to variable. There are some situation in which this can be used, but I feel that’s a bit to specific for this tutorial.
and
This where it get’s interesting. Take a look at the different cards avaible in this part in your own language. They roughly translate to:
- variable is exactly…
- variable is yes
- variable contains…
- variable is lower than…
- variabel is higher than…
- Proceed with a chance of…
- A variable is equal to…
- An equation/comparison is true
- webhook status equals to
Again, the last card is related to webhooks and not part of this tutorial. In this part of the flow, you can let the flow evaluate one or more variables. The possibilities are endless! Apart from the standard comparions such as variable is true or false, variable is higher than / lower than or variable is equal to, you can also add chance to the equation!
I strongly recommend you open each card and test it a few times, to get a better understanding of what the card does. Also, you can compare a variable you created and calculated yourself with other tags just chilling somewhere in Homey’s globe.
I’m taking a small chuck out of the ‘use cases’ here, but imagine you have a few humidity sensors in your living room. As soon as you enter the room, you can let Homey calculate the average humidity (your own variable), compare it to the outdoor humidity (Homey’s variable, just chillin’, like I said before) and let Homey tell you to open up a window. But only when it’s not yet opened (window door sensor). Take a minute to let this sink in, while I get another coffee for the next part.
then
Okay, last one before we go to the use cases. In the then part, you can set the variables to a desired value, using on of the following cards:
- Set a text variable
- Set a number variable
- Calculate a number variable
- Set a yes/no variable
- toggle a yes/no variable
- Send a webhook
I don’t need to explain why I’m not mentioning the last card, do I?
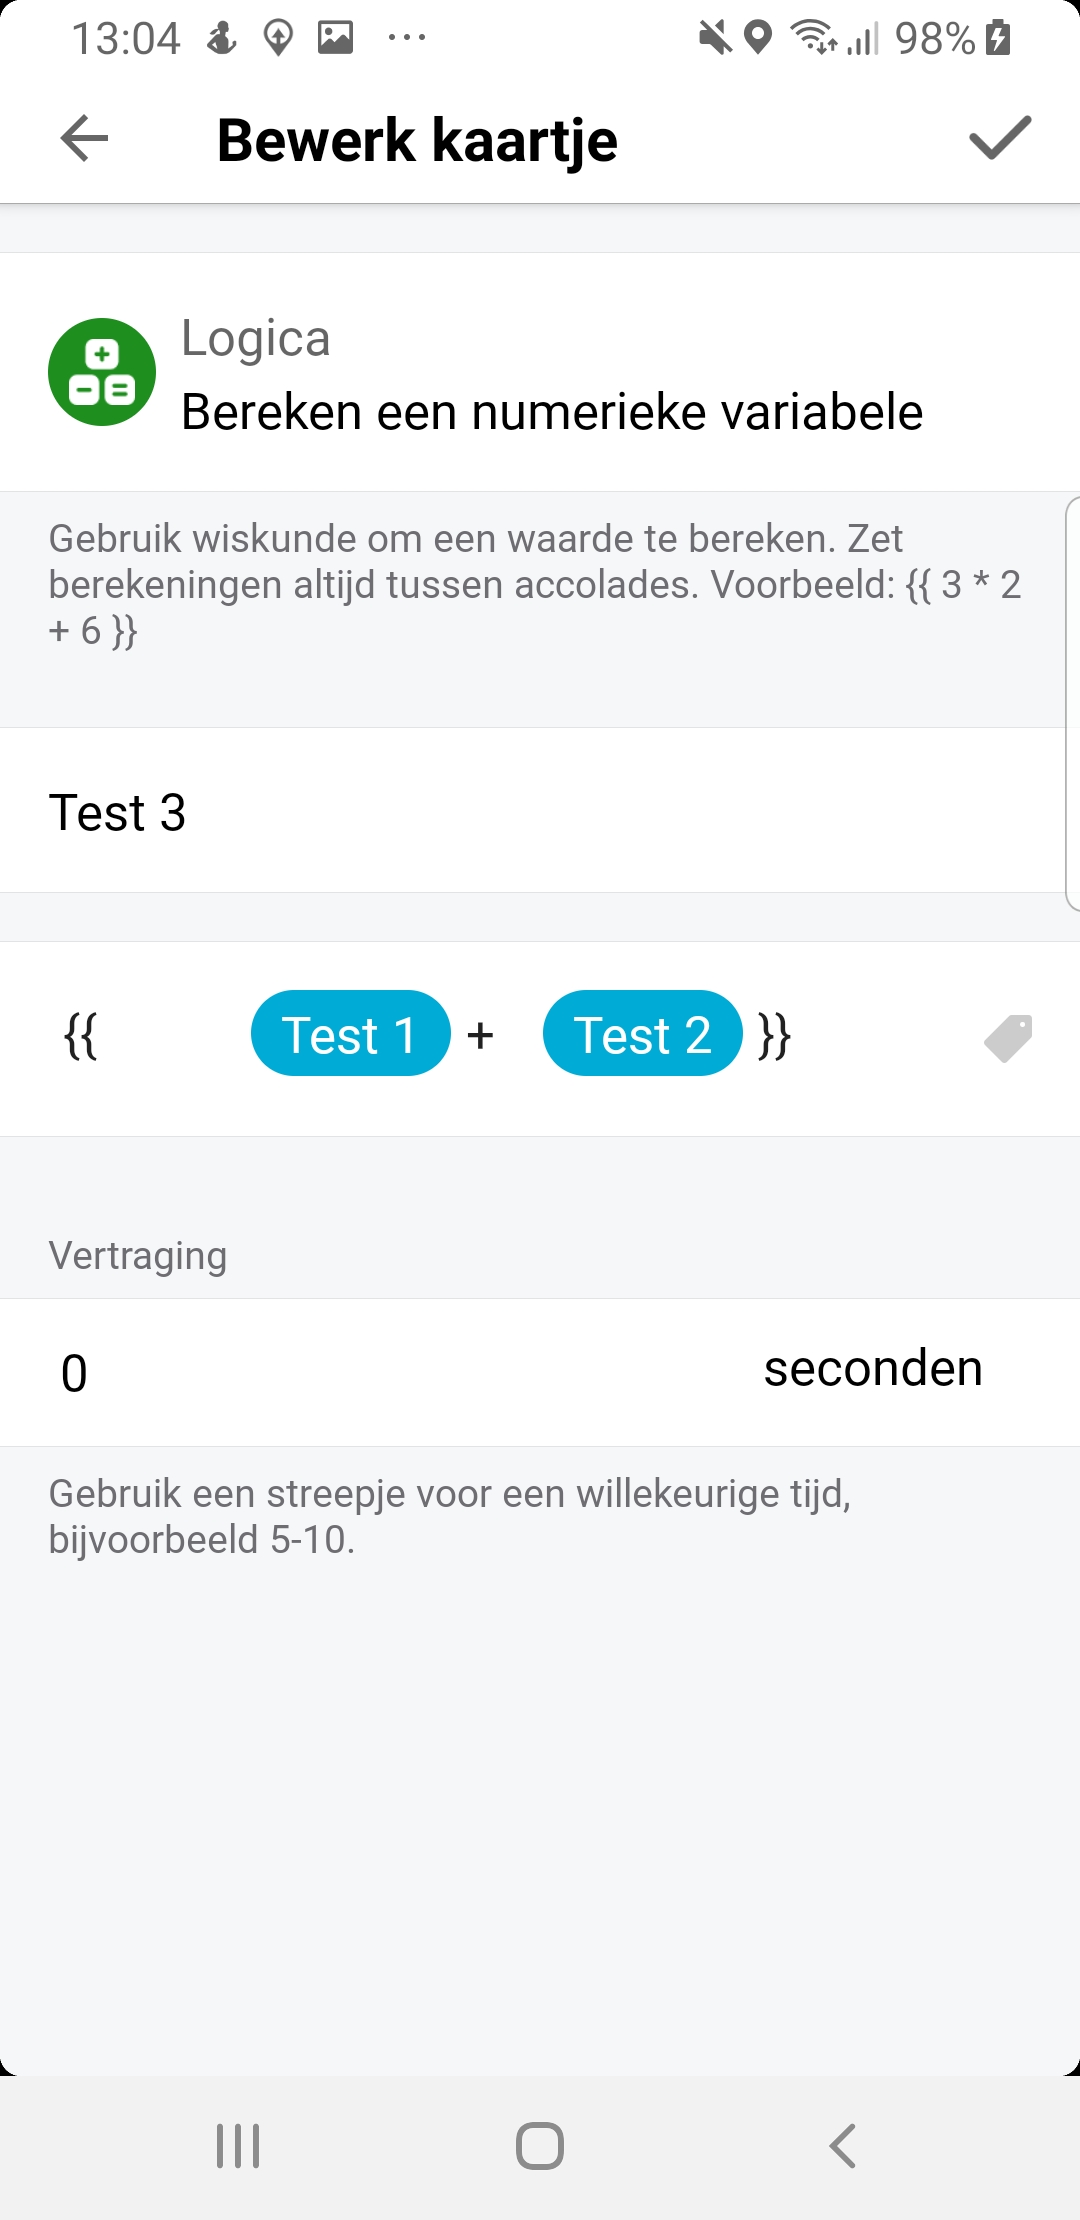
So these cards are all pretty self explanatory. Naturally, the yes/no variable is the only variable that can toggle, because it knows what it should toggle to. Because the other variable have multiple outcomes, they cannot toggle. Makes sense, doesn’t it? The most interesting one is the calculate card. Open one in a test flow, you’ll see something like:

I’ll explain this one for you. As the grey text explains, you will need to place you calculation inside these bad boys { and }. Wich will make it look like {{Test 1 + Test 2}}. Don’t ask me why they require two of them on either side, I simply don’t know. Perhaps someone can explain this in the comments.
The top line (Choose an item) is the variable which will get the outcome assigned to it. I made three number variables, test 1 (5), test 2 (15) en test 3 (-6). In this example, we’ll set the first line to test 3. We want test 3 to be the outcome of test 1 and test 2 added up. So in the second line, which reads ‘Waarde’ (‘Value’ in English), we type {{. We then click on the tag on the right hand side of the screen and select the test 1 variable. Next, we hit the + button. We click the tag again and add test 2. We finalize this by closing the calculation with }}. Your card should read:
And that’s it. You can also multiply *, divide /, substract -, or use figures instead of tags. If I want to know what the volume of Sonos is, but I want 7 as a result instead of 0.07, you can simply set the variable to {{Sonos volume * 100}}. Try to discover other ways of calculating and post any questions in the comments.
Some important things to keep in mind when calculating:
a) Please keep in mind that you shouldn’t use spaces in the calculation. In your flow-card, it’ll sometimes be hard to see if you used a space when also using tags, as Homey automatically leaves some space before or after tags. Just remember, if your flow isn’t working, check it for spaces first
b) Credits go to @JPe4619 for pointing this out. Homey has a ‘round’-function, which automatically rounds the outcome of your calculation. This can come in handy when you need an exact figure to set the luminance of your lights, but as you go, you’ll find a lot of other ways this can be of use. How to use it? Just type round() and put whatever it is you want to see rounded in between the ( and the ). See the screenshot @JPe4619 made in his post below.
use cases
Let’s discuss some use cases of the different types of variables, which might give you some inspiration to use variables in your Homey and could even solve some problems.
Boolean
-
Tracking the state of a device
Unfortunately, there is no IP app for one of my tv’s. So homey doesn’t know whether it’s on or off (I do have a Chromecast as you might remember from another tutorial, but I sometimes watch without using the chromecast, unlike Grumpy). I solved this by adding a wall plug with energy measurement. Now, when the energy reaches a certain level, Homey flips the boolean to yes, which tells me the tv is on. It also turns it off when the energy reaches zero. I used this to alter the behaviour of the lights in the room. You can probably imagine I used the ‘a variable is true’ card in the ‘and’ part of a flow to accomplish this. -
tracking whether a flow has run and stopping it from running again
So, I got a flow which runs when the zone ‘ground floor’ is actived. This flow tells us whether we need to take out the trash (and which type of trash). We don’t want that flow running every time the ground floor is activated. We could try to finetune this by only letting it run between 6.00 and 7.00 in the morning. But that will still let the flow run multiple times and is not always accurate. It’s easier to make a boolean (‘trash’) and let Homey set it to ‘no’ when my alarm goes off (if you don’t have that operational yet, you could also choose a time like 2.30 in the night/morning). As soon as someones walks into the living room, he/she hears what trash needs to be taken out on that day ánd Homey sets the boolean to yes. This requires the boolean to be both a condition in the ‘and’ part of the flow (and ‘trash’ is no) and a action in the ‘then’ part (then set the boolean ‘trash’ to yes).
number
I will not address the first (track (and sometimes set) values such as light intensity, volume, battery level and energy usage) and second (track weather conditions (temperature, pressure, humidity, luminosity and such) and act upon these conditions) here, because, well… I got other things to do, okay?
- create a fictious state and track it
This is the most interesting one of the three anyway. If you get this, you’ll get the other two for sure. A simple use case is a good one, so here it goes. I create a number variable called ‘screensaver’ which increments with 1 every few hours or so. So, the variable starts at 0, after a few hours it jumps to 1. A few hours later it hits 2 and so on. This is what you could call a fictious state, because every number represents the type and color of Homey’s ledring. I like the ledring, but having the same thing every hour of every day is just boring. So, I created a flow which increments the variable and several flows which links the number to a screensaver. I also let Homey set the number back to 0 after it reaches 9, so it’s a loop which keeps repeating. I can obviously intervene whenever I like by adjusting the number. Nothing special, but a good example of a fictious state.
You can also calcute the average temperature / humidity / luminosity of a specific room and let Homey heat up the room, tell you to open a window or open the blinds/turn on the lights with the same concept.
text
-
Date & time (yes, the date and time are not stored in a number variable)
I created new variables which store the day and month in Dutch, rather than English. It’s nice that Homey can tell me it’s 2-11-2019 today, but it’s even better when he says it’s ‘zaterdag 2 november’. And yes, Homey can pronounce the text which you stored in a variable, no problemo! So I simply let Homey change the variable for the day every night and the variable for the month every first of the month, around midnight. -
General description of the weather (e.g. clouds)
You can also use this to translate the weather conditions to your own language (I did!). A disadvantage with this, is that you need to let Homey run a flow every x seconds/minutes. I preferably only let Homey run a flow when it really needs to run one (when a trigger is received). The ‘when’-card in the logic section which reads ‘a variable has changed’, however, does not work for tags, only for variables. So this is currently the only option. -
storing a URL
Perhaps the best way of using a text variable. Let’s say you have a few old tablets just laying around, catching dust. Or let’s say you got more money than your spouse can ever spend and you decide to buy a lot of tablets. You can use a wallmount to hang those tablets all around your house. Why? Because @Rocodamelshekima and @DaneedeKruyff made an awesome dashboard, that’s why! See: Homeydash.com, a Homey dashboard You can simply get your URL once, store it in a variable and use it for every tablet in your house. That prevents you from typing the same URL every time you change something. And trust me, once you get automating, you’ll change a thing or two. It just makes life easier! This can also help you switch between different URL’s when casting them to a tv or Google Nest Hub more easily.
Did I miss something? Sawe somes mystakes in mine Englysk? Would you like to get a beginner tutorial on a different subject? Just hit reply and I’m sure it’ll be fixed before you can say: 'Home automation with Homey, using the BEGINNER tutorials from Neuron, is easy!.
Happy flowing!


