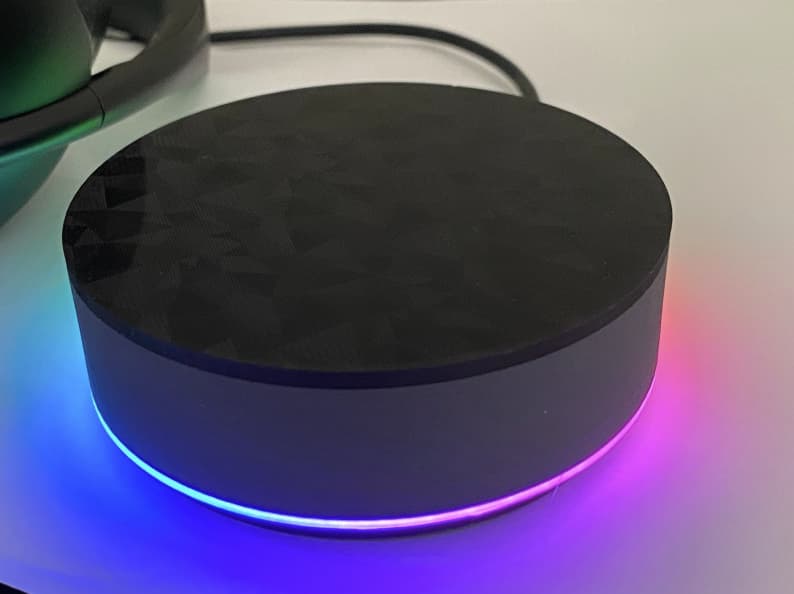
Create your own Homey mini!
Perfect for notifications and reminders.

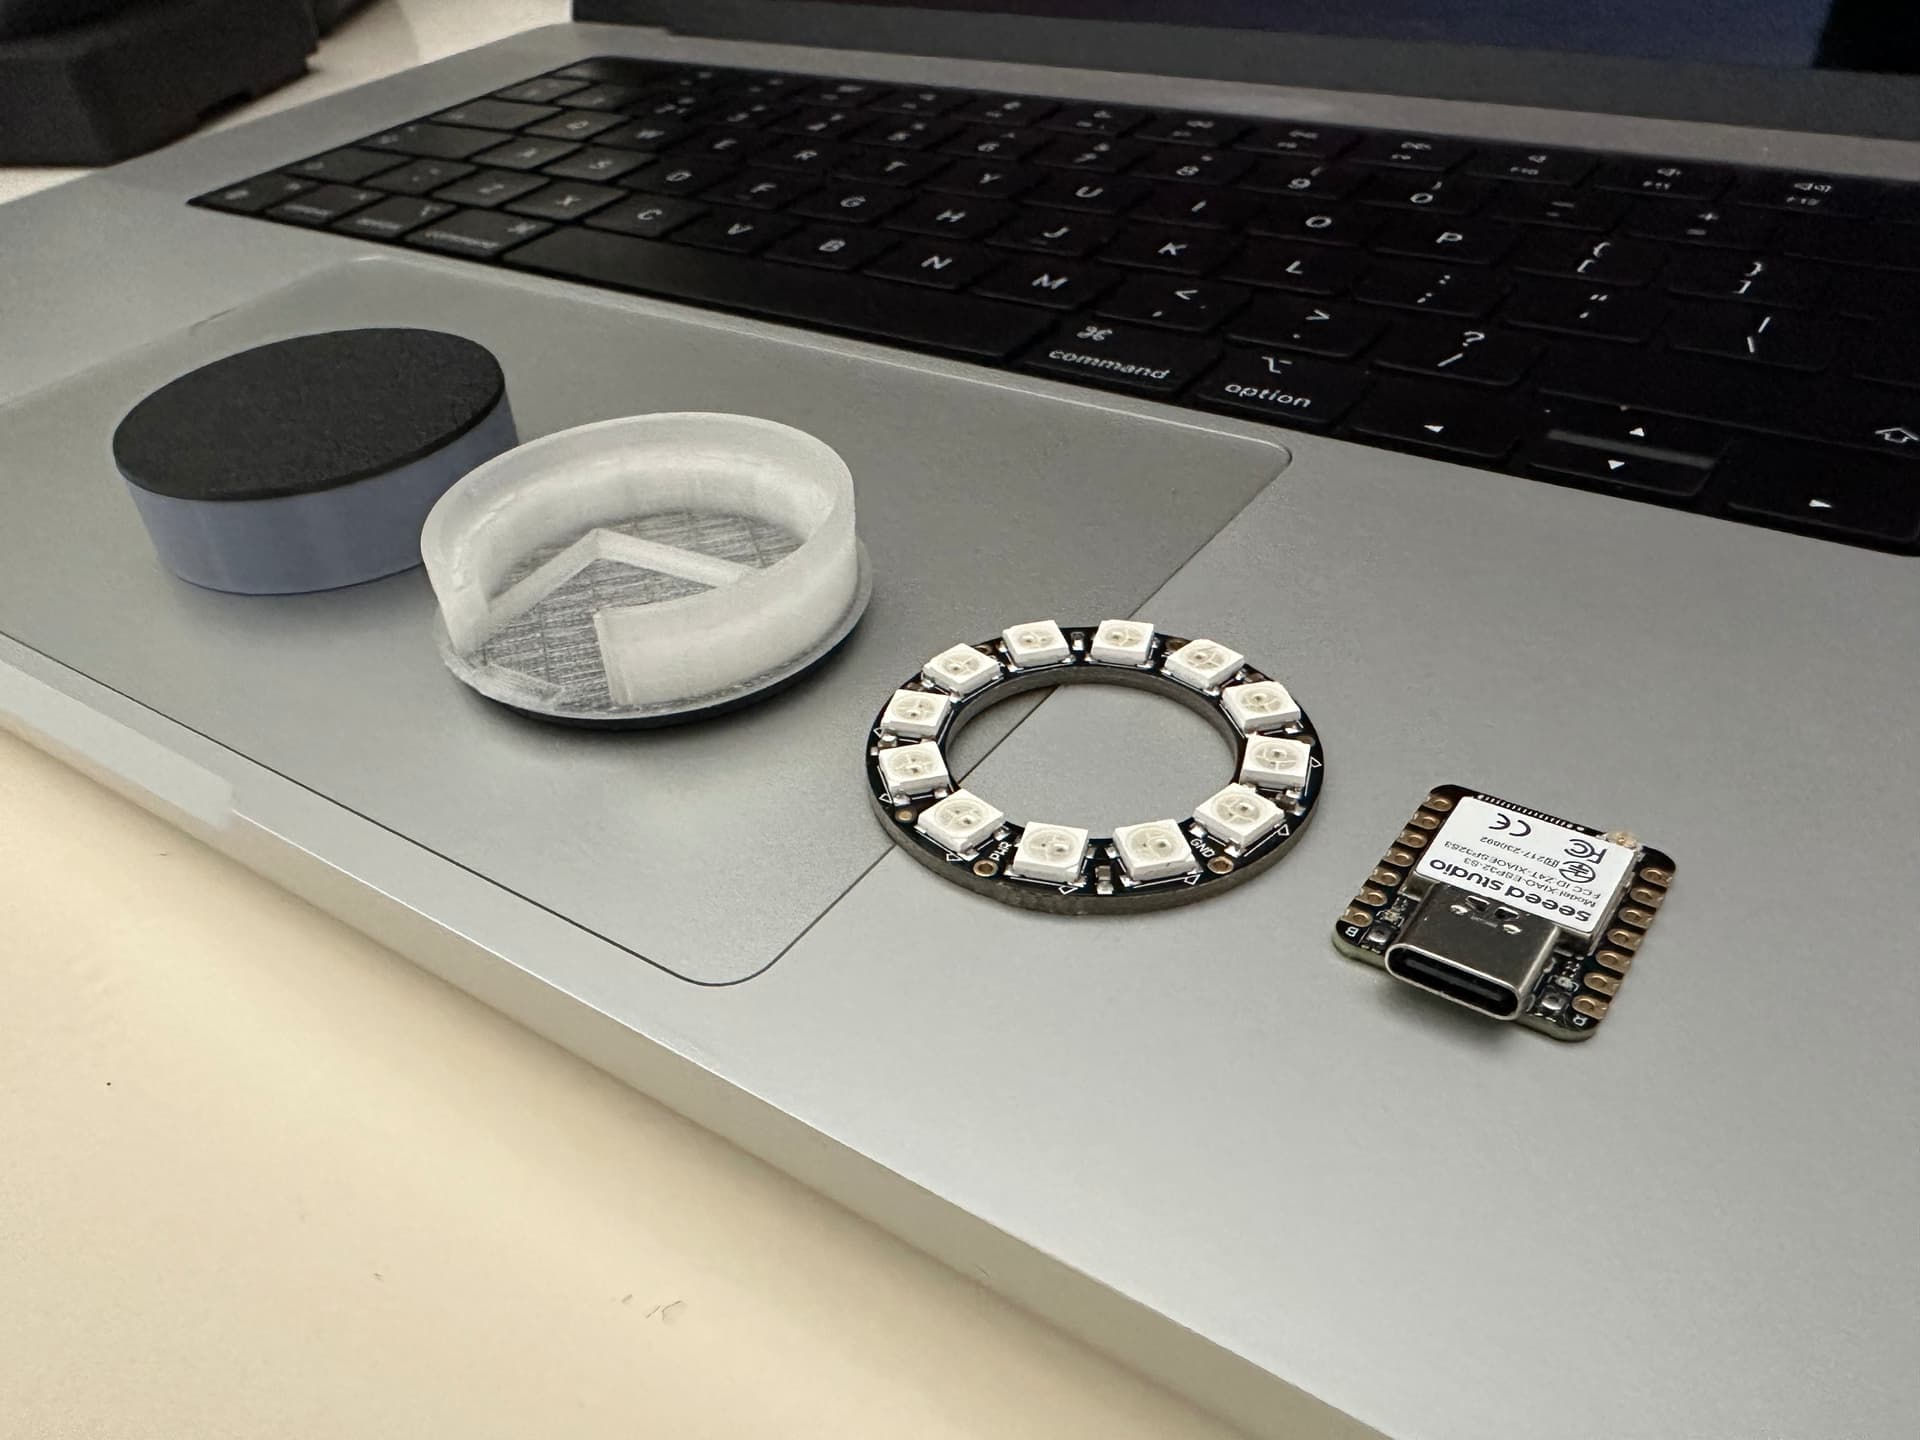
What you need
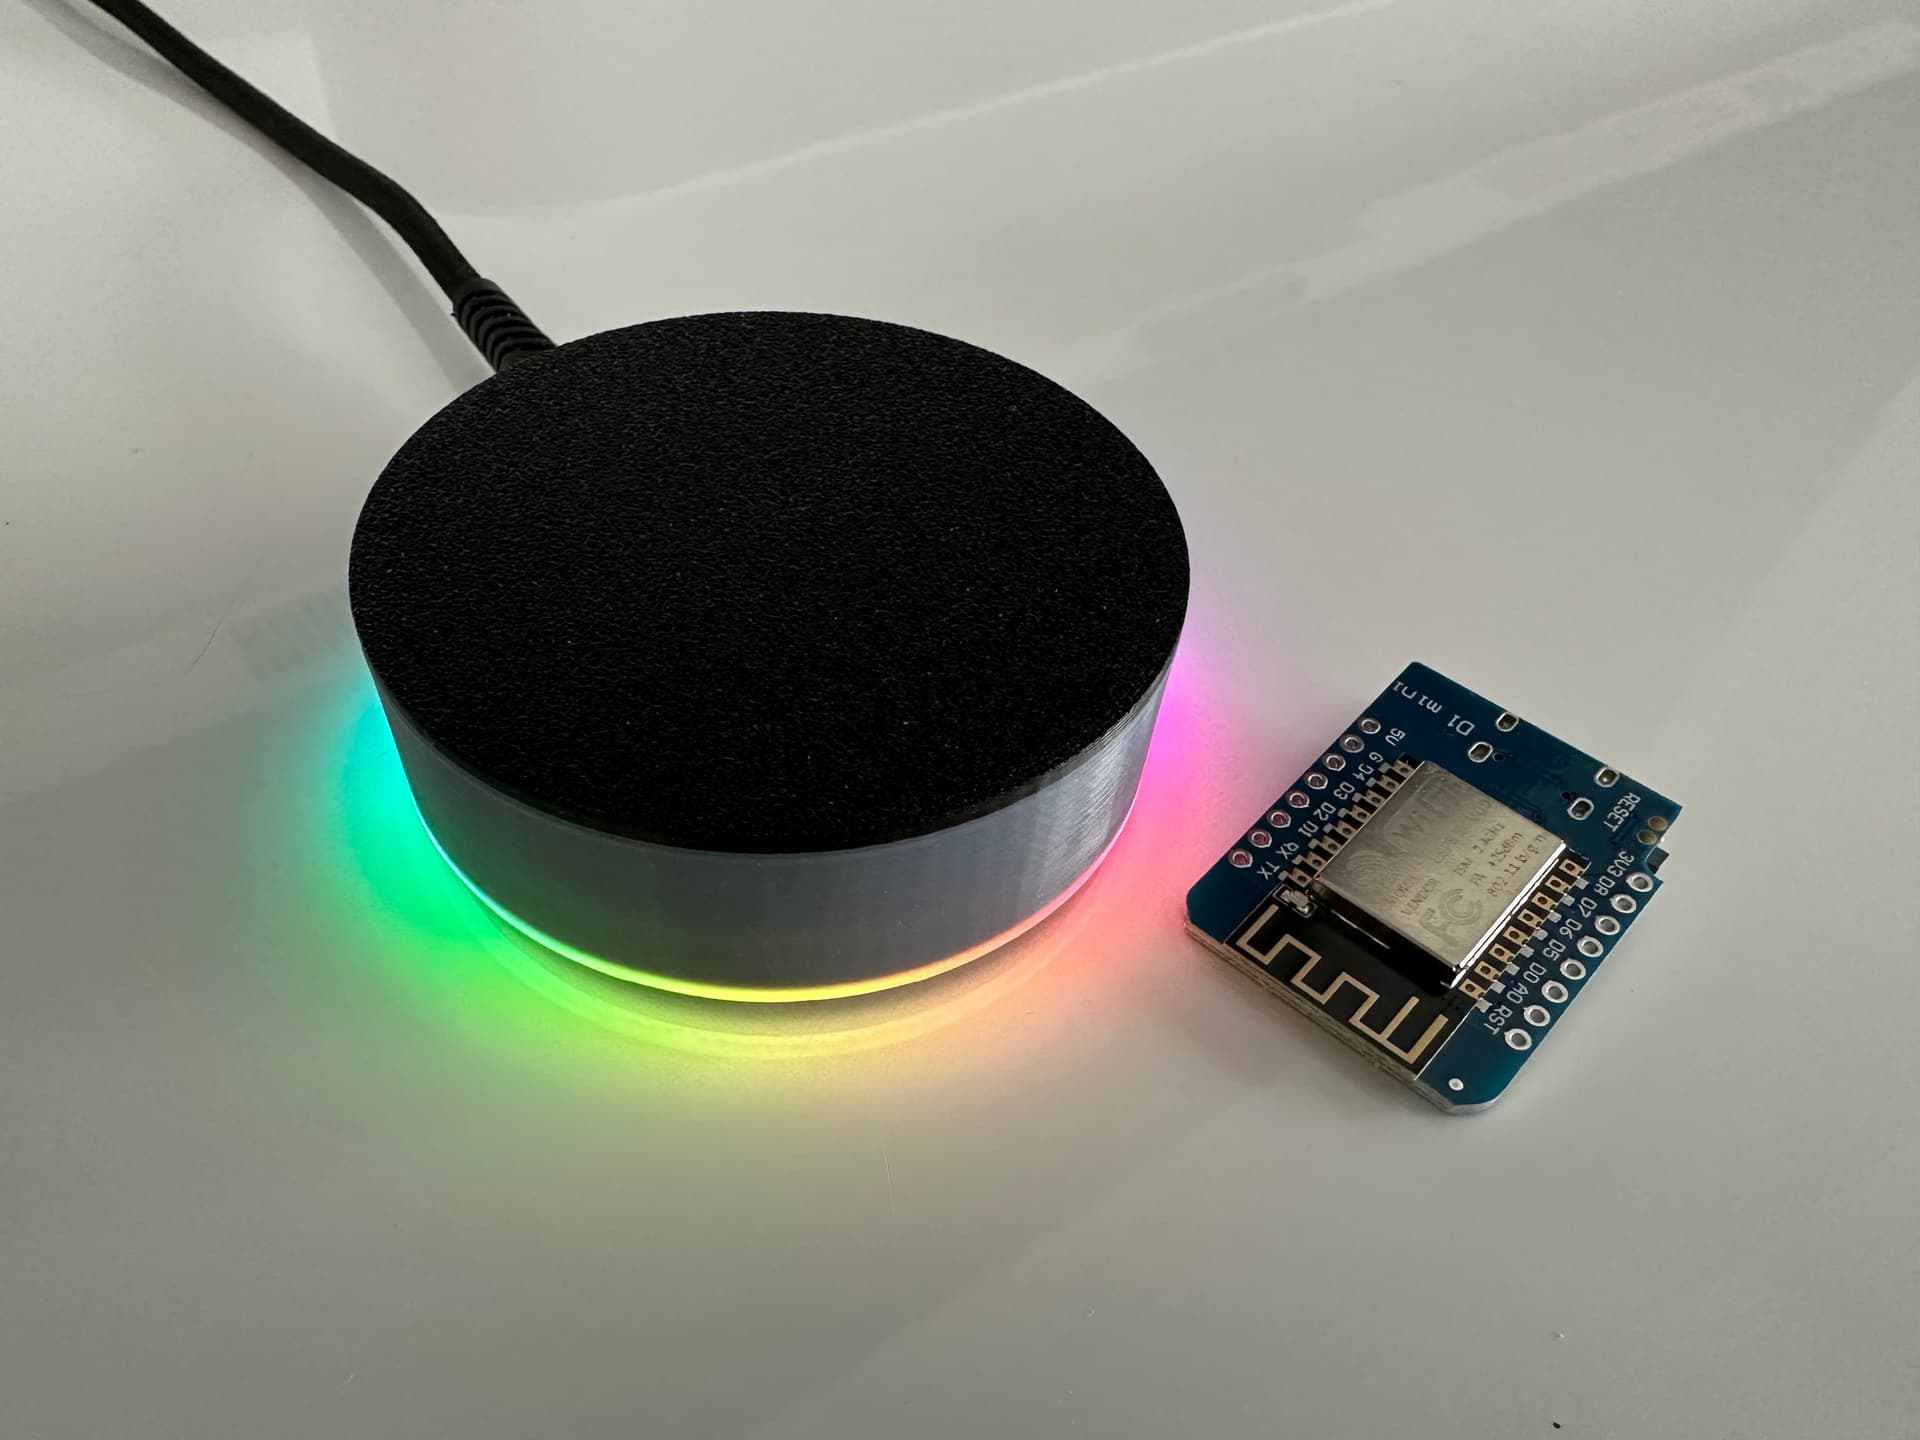
- D1 Mini microcontroller (USB-C) (Amazon)
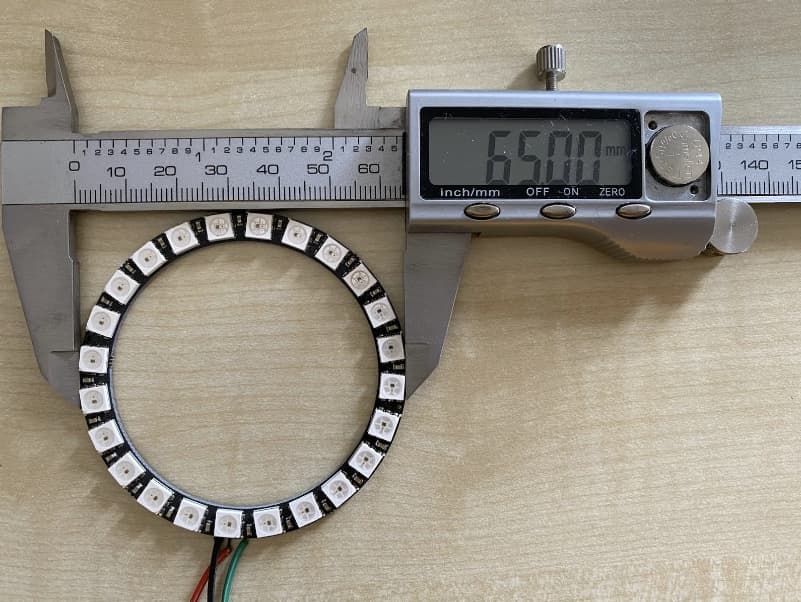
- Adafruit NeoPixel Ring - 16 x WS2812 (Kiwi Electroinics)
- Basic soldering gear
- 3D printed case (Printables)
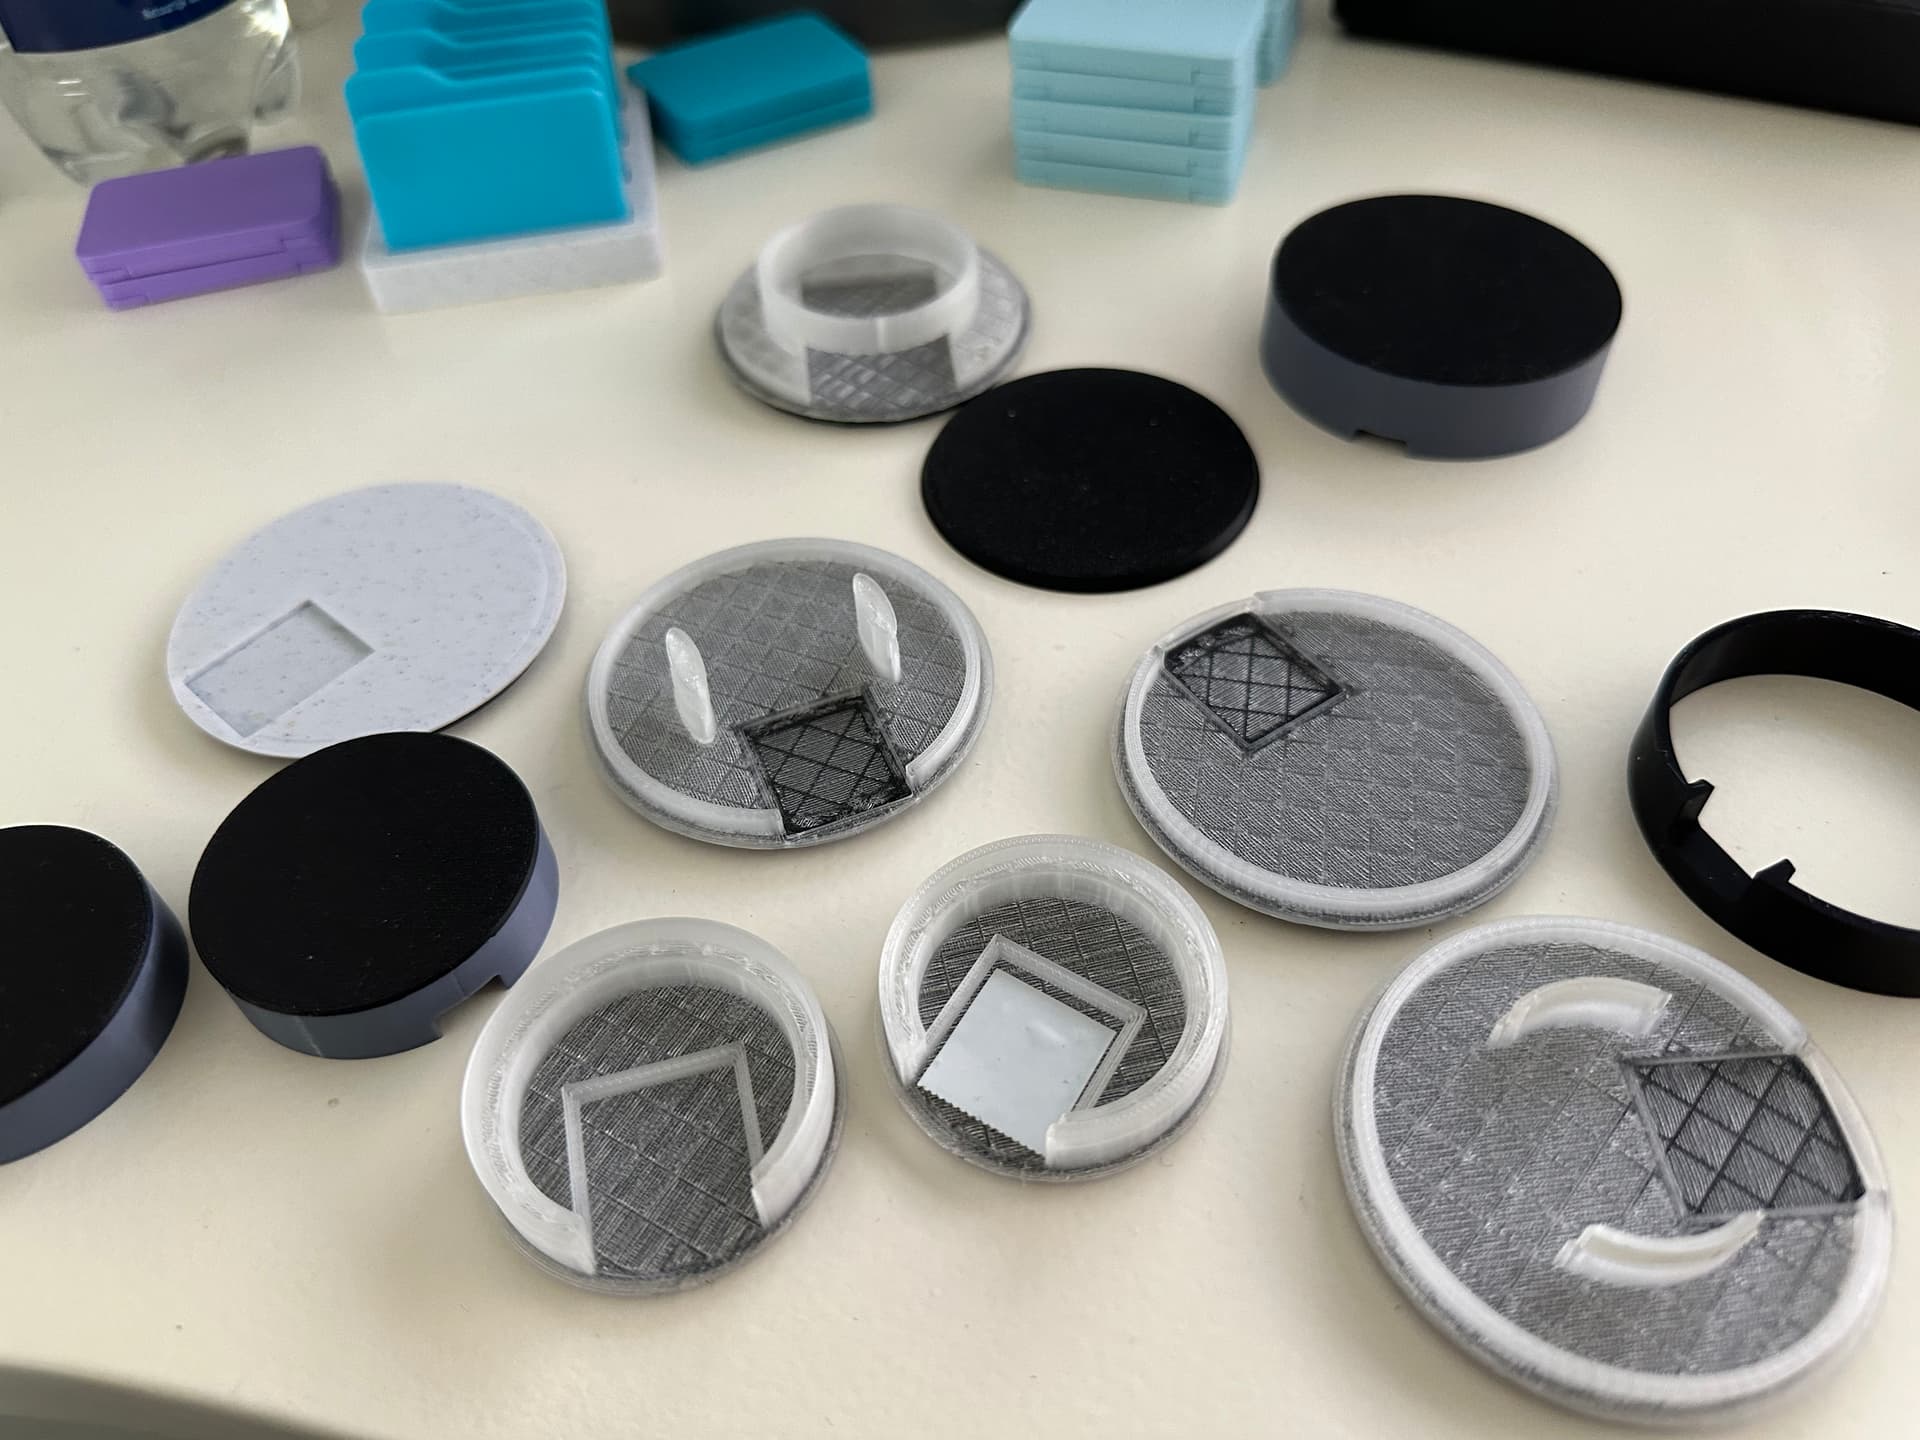
3D Printing the Case
The case of the Homey mini can be 3D printed in two parts; the Top Case and Bottom Case. Both require a filament change mid-print.
The lower part of the Bottom Case is printed in black, while the rest should be printed with a transparent filament. This is crucial for the light diffusion.
While the Top Case can be printed in one color, printing it in two colors is more true to the original. That’s why the lid should be printed in black and dark grey.
I’ve used a Bambu Lab X1 Carbon printer with AMS system to automatically switch filaments. In the Model Files on Printables there is a link to the Bambu Studio files, including all the right settings. For other printers I recommend a layer height of 0.12 mm with 15% infill. With those settings the color change should be done at layer 21 for the Bottom Case, and layer 12 for the Top Case.
Used filaments:
- Eryone Standard PLA Transparent
- eSun PLA+ Grey
- eSun PLA+ Black
Installing the software
Homey mini runs on the popular WLED firmware. Installing is as simple as plugging your D1 Mini into your computer using an USB-C cable. Then visit the WLED Web Installer over at https://install.wled.me (make sure to use Chrome or Edge). Follow the instructions to flash the latest WLED firmware.
When the installation is done, open the WLED interface by visiting the IP address of your D1 Mini in your browser.
Click the Config button, followed by LED Preferences.
Under Hardware setup set the Length to 16 (the number of LED’s in the NeoPixel Ring). Make sure that the GPIO is set to 2 (this is D4 on the D1 mini). Then click Save. Now that the firmware is installed, you can unplug the D1 mini and continue to the construction part.
Construction
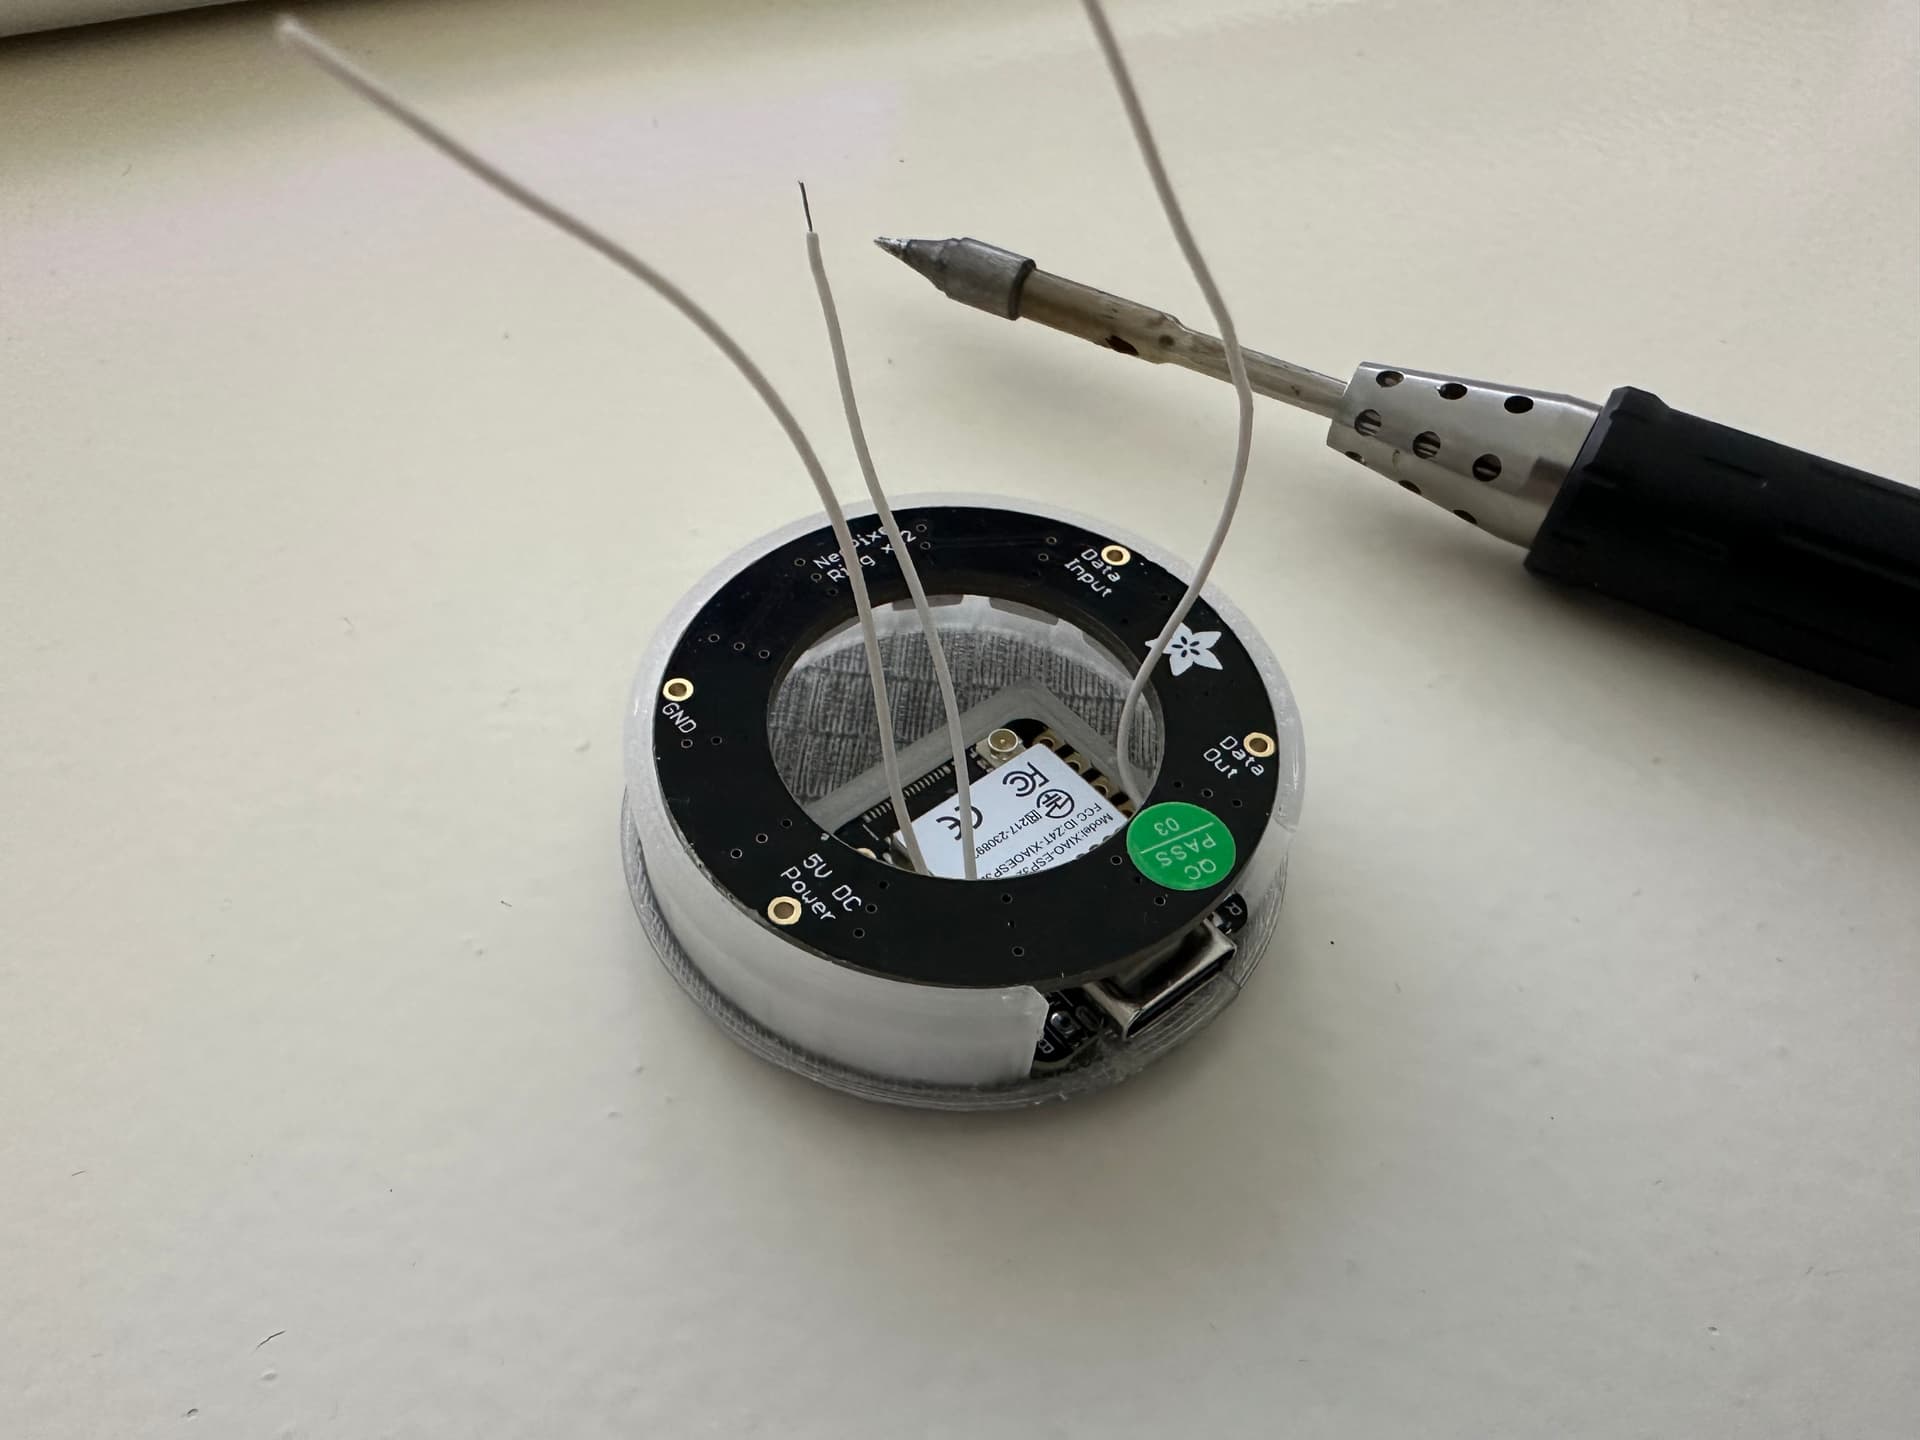
Putting everything together is fairly easy. Solder some wires (keep them long enough for now) to the 5V, G and D4 pins of the D1 Mini. Make sure to solder them while the USB-C plug is facing downward. Once the soldering is done, make sure the wires won’t stick out of the back. If they do, cut them down with some flush cutters.
Align the D1 Mini – with the USB-C connector facing downward – in the cutout on the Bottom Case and press it down firmly. It should snap into the base snugly.
Take the wires coming from the D1 Mini and route them through the center of the NeoPixel Ring, with the LED’s facing down. The ring should snap on the center part of the Bottom Case.
Now shorten the wires (while keeping some slack) and solder them to the pads on the NeoPixel Ring. See the connection diagram below.

Once the soldering is done, it’s time to check if everything works. Connect a powered USB-C cable to the D1 mini and the lights should turn on automatically.
If everything works correctly you can close the Homey mini by snapping on the Top Case. Align the hole for the USB-C connector and press down the Top Case until fully closed.

Usage
Now that your Homey mini is working, you want to connect it to your real Homey for use in Flows.
The most straightforward way is to use the HTTP Request API.
Check out the documentation for a complete list of LED controls:
https://kno.wled.ge/interfaces/http-api/
Example:
192.168.XX.XX/win&A=255sets the brightness to maximumExample:
192.168.XX.XX/win&A=128&FX=0sets the brightness to half and the effect to Solid
When you create a Flow, select the HTTP Request Logic Card and make a GET request using the URL formatted like the examples above.
EDIT: As mentioned by @Robin_van_Kekem it’s also possible to connect the Homey mini directly using the D.A.L.O.R app for Homey!