Can Third Reality 3RSM0147Z display all sensor readings at once?
No, as with all other devices, this isn’t possible.
On the device tile you can choose between humidity, temperature and battery capacity:
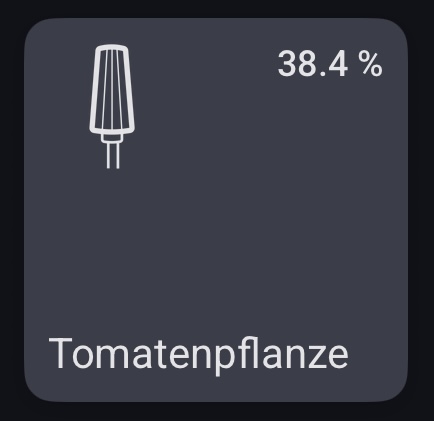


And if you open the device tile with a long press, it looks like this:

However, it’s possible to create a dashboard with the insights of all the capabilities or create an additional Advanced Virtual Device with the Device Capabilities app and reflect the other capabilities. But then of course you have 2 or 3 individual device tiles.
Maybe there is also some app for the dashboard that allows you to display multiple values at the same time, but I don’t know.
At the moment, by the way, the soil moisture is still displayed as humidity. The app developers have used the wrong capability. However, I have already reported this bug on GitHub (Link).
To add to @DirkG‘s post, just for illustration purposes, two of my Advanced Virtual Devices. Each has a custom tile indicator that consists of three items/values:

Thanks for the reply.
J
Thanks for your reply. I’ll look into Advanced Virtual Devices.
J
Can you share your process for displaying the sensor reading?
I assume the tiles are part of your dashboard, which is another project I
haven’t tackled yet.
Thanks.
J
The Advanced Virtual Device (AVD) created by the Device Capabilities app shows up in your devices tab. You can, of course, also add device tiles to a dashboard or display your custom field in a sensor widget on the dashboard.
The way you create such a custom device tile indicator can be done in multiple ways (as always ![]() ), so I am just highlighting the simplest way (as far as I know). I assume you use the web app, though you can also create it via the mobile app. Note that my Homey is set to the Dutch language, so I am translating screen elements, though I am not sure whether the wording fully aligns with what is shown on screen when the interface language is set to English.
), so I am just highlighting the simplest way (as far as I know). I assume you use the web app, though you can also create it via the mobile app. Note that my Homey is set to the Dutch language, so I am translating screen elements, though I am not sure whether the wording fully aligns with what is shown on screen when the interface language is set to English.
Create a new AVD
- Install the Device Capabilities app;
- Create a new AVD. Follow the same process as you would for adding a new device, as part of which you select the Device Capabilities app > Advanced Virtual Device.
- In the initial setup screen select ‘Create an empty AVD’. Next provide a name for the AVD and select an icon (you can change this afterwards). You have now created a blank AVD, that Homey has added to your devices tab.
Create custom field/sensor in the AVD
- The next step is to add/create a sensor/field that will hold your custom text (the combined values). Rightclick the AVD tile and select Repair. This will open the AVD’s configuration screen;
- Scroll down to the Text Fields section and create a new text field using the designated button. Give it a name and optionally an icon (you can always change this afterwards). In this example I named it Status. At ‘Show as’ select the ‘Sensor (Default)’ option in the dropdown;
- Save the changes by clicking the Save Device button. Close the configuration screen using the Close button;
- You will return to the devices tab. Your AVD should now include the Status field/sensor (without a value).

Create flow to update the AVD’s custom field value
- In order to fill and update the value automatically, create a flow.
- As trigger(s) (WHEN) you probably want to use the Third Reality cards for changes in the temperature, moisture level and/or battery percentage.
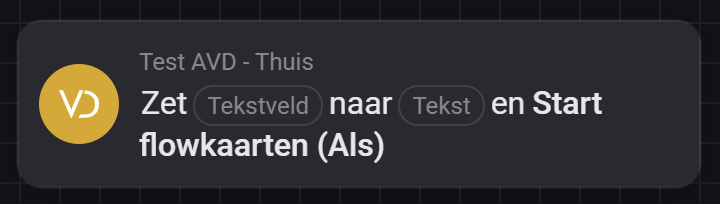
- As THEN card use the one provided by the Device Capabilities app in your AVD: ‘Set (Text Field) to (Text) and Start flow card’:
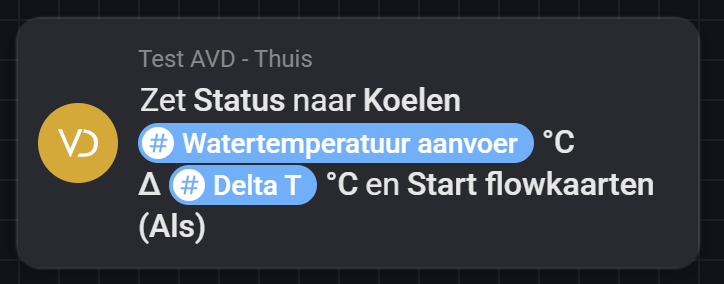
At (Text Field) select the Status field you created earlier. At (Text) input the tags and additional text (if any) that you want to be displayed. - In my example I included (a) some text: ‘Koelen’, (b) a tag holding the water temperature value and the degrees Celsius symbol, (c) an additional tag with a delta temperature value and again the degrees Celsius symbol:
In your case you would want to include the temperature, moisture level and/or battery percentage values; - Test and save the flow: it should have updated the status field in your AVD.
Set AVD tile’s indicator
-
The last step is to make the custom text field visible on the AVD’s tile. The process is the same as for any other device: right click the tile, select Settings, in the Status Indicator dropdown list select your Status field:
-
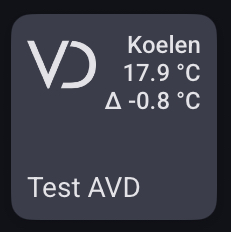
Save the changes. The AVD’s device tile should now show the Status field as its indicator:

I hope this guidance helps!
That is a most helpful set of instructions. It’s good enough to share with the
whole community, unless you prefer not to. Thank you.
Now I can play with my new “toy”.
J
I just picked up a pair of the soil moisture sensors (gen 1) today. I already have the Third Reality app installed to handle several vibration sensors etc. and they’re all working fine.
The soil sensors paired right up no problem. BUT, then drop off after about 15 seconds, and the blue LED starts blinking again indicating it wants to pair. The device tile gets a red triangle.
Doing Repair works fine, and it back to normal. For 15 seconds - then it drops off again. I never see any values from the device. Thought perhaps it was the amazon basics battery that was poor, tried a fresh Duracell. Same same, just drops right off.
The zigbee network is stable. Channel 11 on 2.4GHz is disabled on the local network, so the upper range is clear for zigbee to use channel 25, and the other 20 or so zigbee devices work perfectly.
Am I missing something basic for these ?
