TheHomeRemote is a very affordable dashboard which has clients for Windows, Android and Mac. Using the MQTT protocol it can communicate with Homey. This tutorial is not showing in-dept how to configure Homey. In short: On Homey (Pro) you need to install and configure the MQTT Hub, Broker and Client. After this part is done you can check with MQTT explorer if and how the devices are listed. Now the fun can begin.
Download the free Designer @ https://thehomeremote.com/, install it and start it up. Create a new project (File – New).
Make you choice on which platform you want to use TheHomeRemote. It’s quite flexible: I use the same project in the Windows app and @ Android without changing anything.
Right-click the Devices folder in the tree and add MQTT. A window will popup with some settings you need to fill in.

If all Ok the windows will close.
Now right-click the new Mqtt icon that appeared under devices and choose “Add Variable”.
The Variable needs a Name, a Subscribe Topic and a Publish Topic. You can find the Topic using the MQTT explorer.

With the Subscribe topic THR can read the status of (for instance) a lamp, with the Publish topic it can change the status.
Now right-click Pages in the tree and add a page.

Add this page to the Index page:


Now go back to the tree and the Pages folder and doubleclick Page1.xml for a blank canvas.
Add a Button by clicking the XXXX button on the top-row and dragging a square on the canvas. In the properties bar on the right you can change it’s appearance, like the color and rounded corners.

At the bottom of the Properties the Triggers can be set:

When the button is clicked, an action needs to be started. The EventTrigger is automatically added, but it’s empty. Click the three dots behind Actions, and you can fill in the Binding (in this case Mobilamp) and a value.

The format of this value can be found using the MQTT Explorer: true of false:

Close the Collection editor and copy the button, change it’s color and change the DataAction from true to false

Now you can go to the Home menu and press the Start button. The lamp should go on and off, depending on the buttons of course.
To view the status of the lamp, you can add pictures (Images) with an off and on lightbulb for instance:
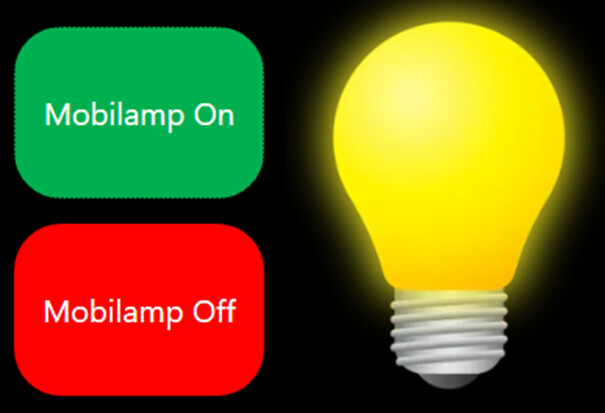
To show the pictures you click the Image icon in the top-row and drag it besides the buttons.
The Triggers box is empty, so add a DataTrigger (and copy it later):

The Binding is again the lamp, it’s Value is true, now click the three dots behind Setters.
Here we set that if the Mobilamp is on (true) the Image lightOn.png is loaded.

Copy the DataTrigger, set as Value false and change the Image to lightOff.png.
That’s it! The lamp can be turned on and off and you can see it’s status.
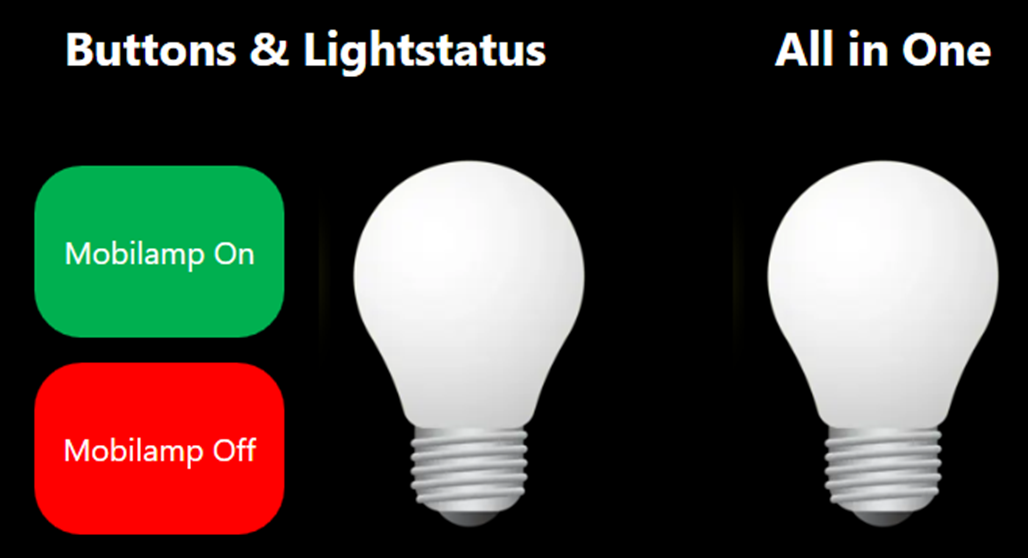
Another possibility is to create an Image Button and combine the three items into one button. In this case you have to make 2 EvenTriggers and 2 DataTriggers:

When Clicked:

Condition (from within the Triggers section or from the Collection Editor):

Then copy the EventTrigger and reverse the true and false values.
For the DataTriggers you use the Image-Setter trick again.
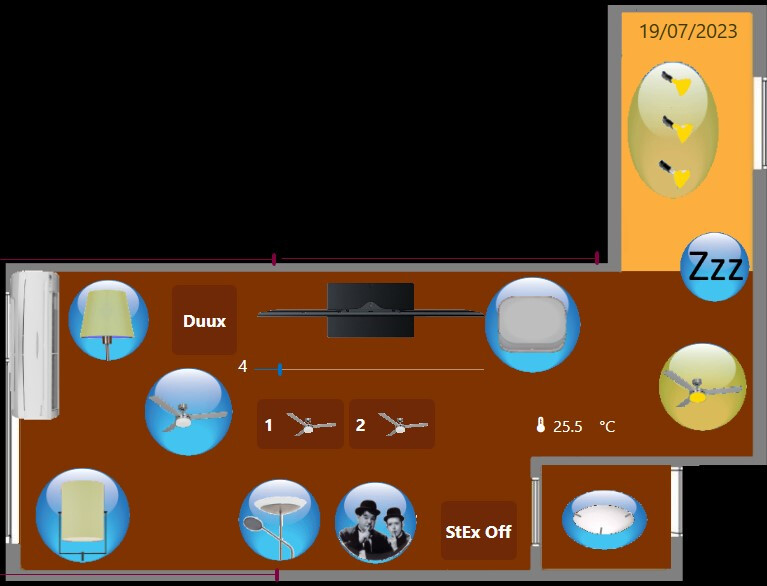
My dashboard contains (among lots of other stuff) a map of my living room and kitchen.
It’s not the most beautiful, but very handy to switch my lights (and fans!) on- and off:
Questions?
