I’ll try to show how I did it:
Step 1: Add Registry:
You already did this step, but for the whole story, I think it is important to have the correct registry
Open Docker, go to registry and search for “chrisns”.

There you see the ‘docker-node-sonos-http-api’, click this and hit the ‘download’ button. Leave ‘latest’ and hit OK.
The image will be downloaded now.
Step 2; Create container
Go to ‘image’ and search the docker-node-sonos-http-api image. Click it and hit the ‘launch’ button:

Step 3; Configure container
Give the container a meaningful name, or leave it as is, but that’s up to you.
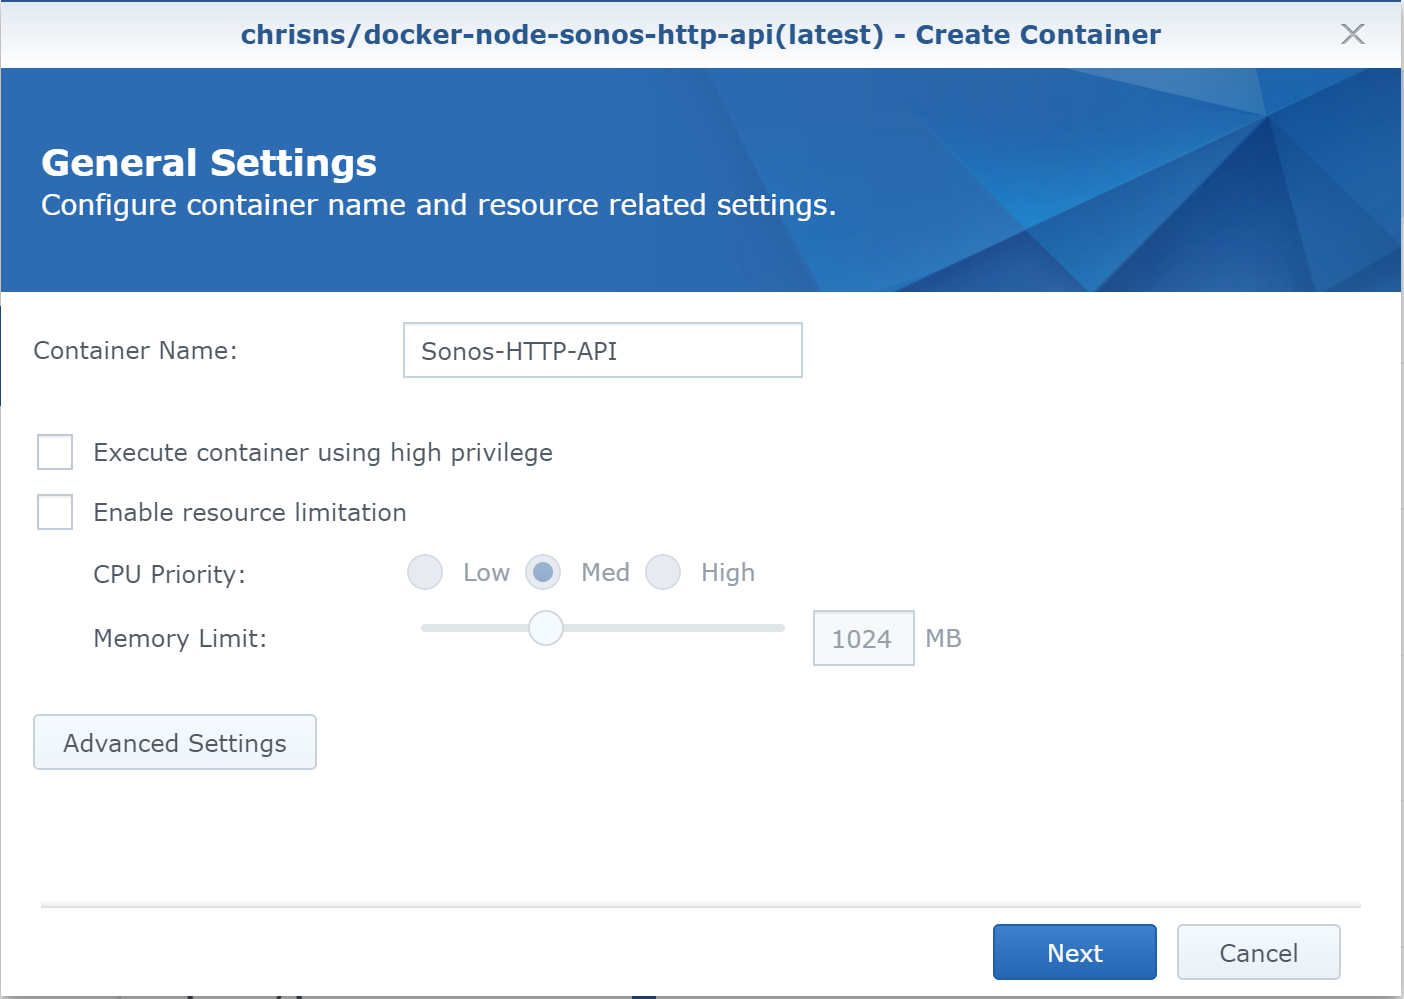
Hit the ‘Advanced Settings’ button.
On the ‘Advanced Settings’ page, check the ‘enable auto-restart’ option.

On the ‘volume’; this is where the volumes get created, but only once. The reason ‘we’ do this is to keep persistence across docker image updates. What we basically do is expose local directories on your NAS to the docker container for it to use these directories and files inside the container.
According to the manual we need to have 4 folders:
- clips
- settings
- cache
- presets
If these are not present, we are going to create these during this setup, if they are present, then just select them and do not create them.
Hit the ‘add folder’ button:

Browse to the folder you want to create the ‘new’ folders in. And select it (!DO NOT click the select button just yet). What I typically do is create a new folder with a name corresponding to the docker image and create subfolders inside it.
Click the ‘create folder’ button and give it the first name of list above (eg clips). When the folder is created hit the ‘select button’.

The folder will be added to the list:

Now we have to add a mount path, these are the following:
- clips → /app/static/clips
- settings → /app/settings
- cache → /app/cache
- presets → /app/presets
Repeat these steps to create / select all folders, it should look like the following:

Go to the tab ‘network’ and check the ‘Use the same network as Docker Host’. This makes sure the image uses the ‘ports’ on host (your NAS) also called the ‘host’ network. Be sure there is nothing else running on port 5005, which is used by this image. If port 5005 is already in use by another application / docker or whatever, the image creation will fail.

There are no other settings needed, so hit the ‘Apply’ button on the bottom of the screen.
Now if everything is set up, hit the ‘next’ button:

On the Summary page, all settings are displayed again for a final check, hit ‘apply’ if you agree with hit. And since the checkbox is checked to start the container after hitting ‘apply’, it should now start. Uncheck it if you want to do the final steps too.

The final steps:
- Open powershell (or terminal if using mac) window and type “ssh username@nas-ip” (replace username with your admin account and the nas-ip with the IP address or hostname of your NAS device).
- Enter yes at accepting the key
- Enter your password
- enter the command: “sudo su -” The dash sign on the end is important. Now enter your password again.
- Be sure the container is not running and change to the container directory, you have created it during the previous manuel. (cd /volume1/docker/sonos for example)
- Enter the following commands:
curl https://raw.githubusercontent.com/jishi/node-sonos-http-api/master/presets/example.json > presets/example.json
echo {} > settings/settings.json
- type exit and exit again and start the container.
More info can be found on GitHub - chrisns/docker-node-sonos-http-api: Docker wrapper for https://github.com/jishi/node-sonos-http-api.
There you go.
Hopefully it works for you.
//updated the steps to include the last (optional) steps too
