Daikin Altherma with ESPAltherma

Get all information from your Daikin Altherma Heat Pump

This app enables you to read information from your ESPAltherma device connected to your Daikin Altherma Heat Pump. You will only be able read information, you will -not- be able to control your heat pump with this app.
Also, this app is -not- ment to be a replacement for the Daikin Onecta app by @Mickel_Luiten


IMPORTANT: One of the prerequisites to use this app is to have an MQTT Broker in your network where the information from your ESPAltherma is available. More information about ESPAltherma can be found here.


IMPORTANT: This is still an early test version of this app.
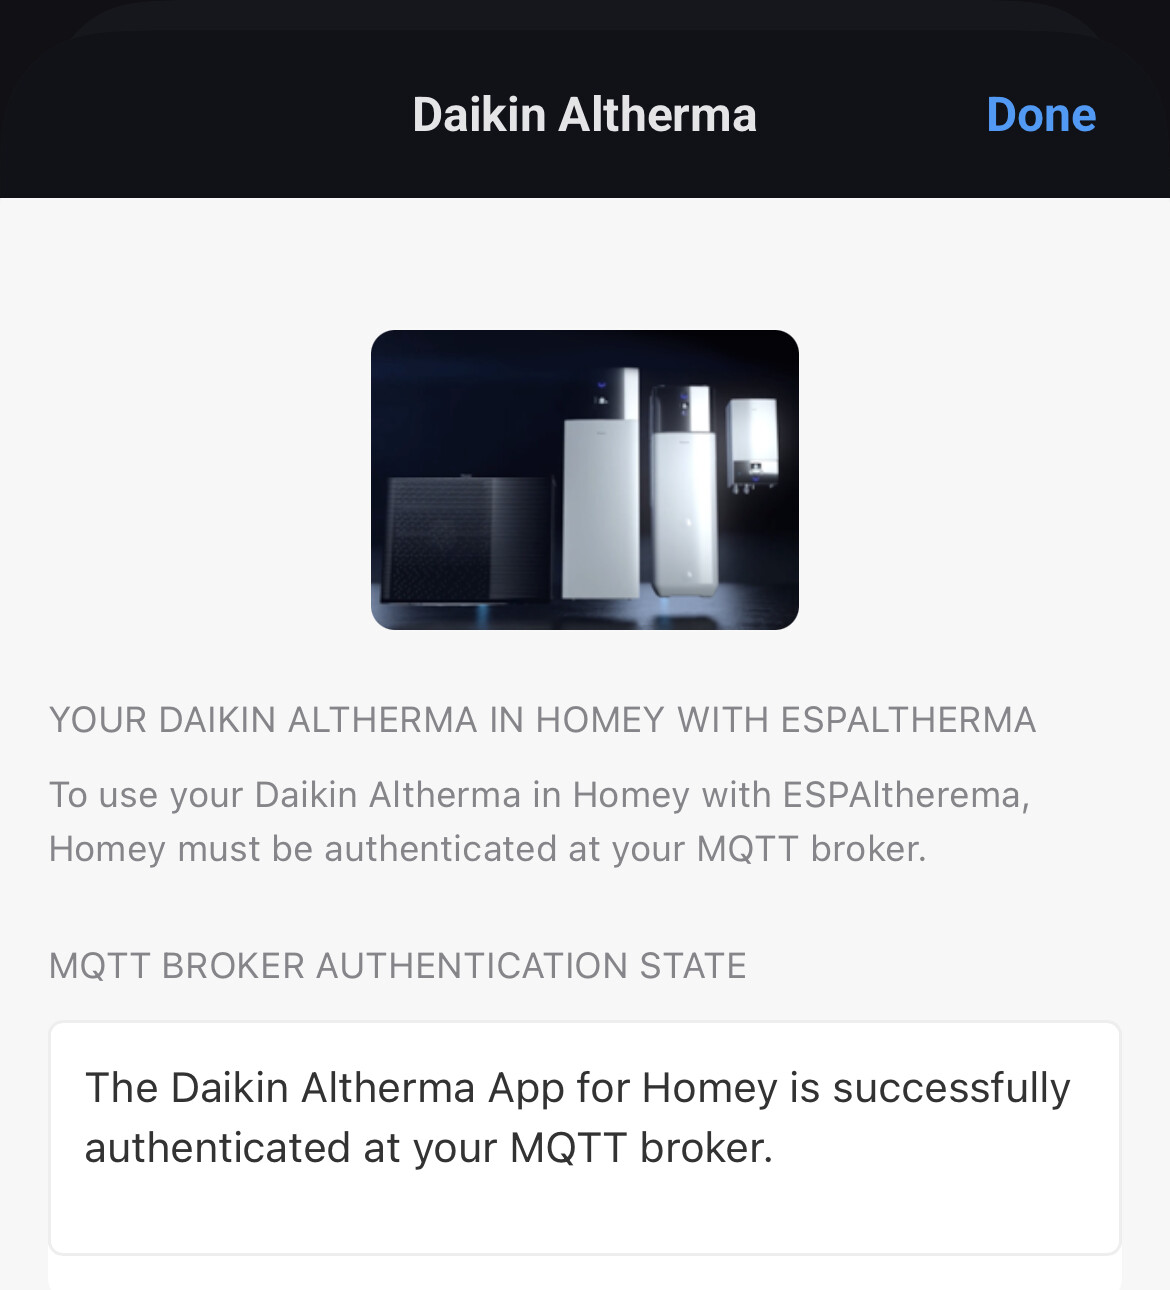

Supported devices

Support is not limited to the below shown devices, your device may look different.


Daikin Altherma Heat Pump

This device has the following capabilities:


Daikin Altherma Water Tank

This device has the following capabilities:

How to use the app

Please make sure to configure the required labels in ESPAltherma, go to the App settings and configure the settings for your MQTT Broker.
Detailed instructions can be found in How To: Configure ESPAltherma and the Daikin Altherma app.

Next, add the Heat Pump and Water Tank devices, this is no different then adding any other device to Homey. Head on over to the devices tab in the Homey app, click the + button, select New Device and select the Daikin Altherma app. Next, select the Heat Pump or Water Heater device and complete the steps to add the device.

Additional information

Power usage, Energy consumption, and Coefficient of Performance (COP) are based on data from an internal current sensor. These values require additional information—such as grid voltage—which isn’t measured by your Daikin Altherma. By default, the app assumes a grid voltage of 230V for these calculations. Because grid voltage fluctuates, you can have the app read the actual voltage from your MQTT broker. Instructions to set this up can be found here:

Additional flow cards

Next to the flow cards that are automatically created for the devices, the app features flow cards to be informed of warnings and errors. You can use the A warning occurred in the app flow card to get informed when for example there is no new MQTT data received for a while or the voltage on your ESPAltherma is low. Any unforeseen app error can be made visible by using the An error occurred in the app

Here’s inspiration how to use the cards

Supported languages

Translations were done using ChatGPT, please inform me of any errors on Github
:uk: English
:netherlands: Dutch
:denmark: Danish
:fr: French
:de: German
:it: Italian
:south_korea: Korean
:norway: Norwegian
:poland: Polish
:es: Spanish
:sweden: Swedish


Links


If you want to support this app, please consider a donation

image

ko-fi

Donations are very welcome, though they come with no guarantees, warranties, or preferential treatment (just think of it that you’re donating for the work already done, not the work to be done).

FAQ

Q. I do have a Daikin Altherma Heat Pump, but have not yet setup ESPAltherma. Can you recommend me what ESP device to buy
A. You’re completely free to buy any ESP device you want, but it’s important to realise it’s impossible for me to test or support all ESP device variants out there.
In can only try to give support when an M5Stick C Plus 2 is used.

Q. I can’t get ESPAltherma working, can you help me?
A. This topic is primarily for supporting the Daikin Altherma App for Homey. One of the prerequisites is a working ESPAltherma publishing its information to an MQTT broker.
Please visit ESPAltherma at Github to get support on installing and configuring ESPAltherma

Q. I think the Power Usage and Energy Consumption aren’t accurate.
A. Yes, that can be. There is only a current sensor in your heat pump which isn’t enough to get actual Power Usage and Energy Consumption so the app calculate these values based on an assumed grid voltage of 230V. In reality the grid voltage will fluctuate. Please see How to: Use actual grid voltage for Power usage, Energy consumption, and Coefficient of Performance (COP) calculations to get more accurate values.

Changelog

Current test version: 0.0.7

  • Added continuous power usage setting (experimental)
  • Added BUH1 and BUH2 usage settings

Previous test version: 0.0.6

• Improved 1-phase power calculations (experimental)

Previous test version: 0.0.5

• Improved error logging
• added 1-phase power calculations (experimental)

Previous test version: 0.0.4

  • Added translations
  • Replaced capability icons
  • Improved Power usage and Energy Consumption calculations
  • Improved logging
  • Various minor improvements

Previous test version: 0.0.3

  • Improved setting up the MQTT broker connection

Previous test version: 0.0.2

  • Heat Pump device available
  • Water Tank available
  • Estimated Power Usage, default based on a set Grid Voltage
  • Estimated Power Usage, based on external Voltages
  • Estimated Coefficient of Performance (COP)
  • Flow card triggered on errors
  • Flow card triggered on warnings

Roadmap

In no particular order, no eta will be given

Add Heat Pump device
Add Water Tank device
Add Power usage and Energy consumption capabilities
Add correct capability icons
Add Coefficient of Performance (COP) capability
Add flow card with a tag to make errors available
Add flow card with a tag to make warnings available
Add Method to read actual voltage(s) from MQTT Broker
Improve logging
Improve Power usage and Energy Consumption calculations
Add Method to read actual power usage from Smart Meter
Add additional languages
…

How To: Configure ESPAltherma and the Daikin Altherma app.


This assumes your ESPAltherma and MQTT broker are already setup and functioning. See ESPAltherma Github for more information how to setup that part.


Configuring the required information in the ESPAltherma definition file

The Daikin Altherma app will read the need information from your MQTT broker and requires certain information for the devices capabilities. Please make sure the information of your ESPAltherma is published to the (default) topic espaltherma (case sensitive!)
Next, uncommented at least the following labels in the definition file for your particular Heat Pump:

{0x10,0,217,1,-1,"Operation Mode"},
{0x10,1,307,1,-1,"Thermostat ON/OFF"},
{0x10,1,304,1,-1,"Defrost Operation"},
{0x10,4,203,1,-1,"Error type"},
{0x10,5,204,1,-1,"Error Code"},
{0x20,0,105,2,1,"R1T-Outdoor air temp."},
{0x21,0,105,2,-1,"INV primary current (A)"},
{0x21,2,105,2,-1,"INV secondary current (A)"},
{0x60,2,315,1,-1,"I/U operation mode"},
{0x60,7,105,2,1,"DHW setpoint"},
{0x60,9,105,2,1,"LW setpoint (main)"},
{0x60,12,306,1,-1,"3way valve(On:DHW_Off:Space)"},
{0x60,12,304,1,-1,"BUH Step1"},
{0x60,12,303,1,-1,"BUH Step2"},
{0x61,2,105,2,1,"Leaving water temp. before BUH (R1T)"},
{0x61,4,105,2,1,"Leaving water temp. after BUH (R2T)"},
{0x61,8,105,2,1,"Inlet water temp.(R4T)"},
{0x61,10,105,2,1,"DHW tank temp. (R5T)"},
{0x62,2,304,1,-1,"Powerful DHW Operation. ON/OFF"},
{0x62,2,303,1,-1,"Space heating Operation ON/OFF"},
{0x62,5,105,2,1,"RT setpoint"},
{0x62,7,304,1,-1,"Main RT Heating"},
{0x62,9,105,2,-1,"Flow sensor (l/min)"},
{0x64,3,105,2,-1,"BE_COP"},

(Please note, not all labels are visible as a capability but are required in underlying calculations for example for power and energy usage, some are for future use.)

After uncommenting these labels, please make sure to upload the new version to your ESPAltherma device.

Configuring the Daikin Altherma app in Homey

After configuring your ESPAltherma device, it’s time to set up the Daikin Altherma app. Make sure you have the login details for your MQTT broker handy, then open the Homey app and go to the Daikin Altherma app’s settings.

You can use your MQTT broker’s hostname, as long as Homey can resolve it to the correct IP address. If you’re not sure, use the MQTT broker’s IP address instead.

Next, fill in the logon information and click the Connect button

After successful logon, the MQTT Broker authentication state will look like this:

You can now exit the settings by clicking Done and add your Daikin device(s) to Homey!

How to: Use actual grid voltage for Power usage, Energy consumption, and Coefficient of Performance (COP) calculations

Power usage, Energy consumption, and Coefficient of Performance (COP) are based on data from an internal current sensor. These values require additional information, such as grid voltage, which isn’t measured by your Daikin Altherma. By default, the app assumes a grid voltage of 230V for these calculations.

This post will show you how to configure the Daikin Altherma app to read your actual voltage(s) from your MQTT broker, and how you can send the actual voltage(s) to your MQTT broker in case the information is not yet available on your broker.

Configuring the Daikin Altherma app in Homey

Open the Homey app and go to the Daikin Altherma app’s setting. Now scroll past the MQTT information to reach the Use external voltage setting in the Power calculation section.

Slide the slider to the right to turn the feature on and reveal the MQTT topics for phase voltages

As you can see, the topics will default to espaltherma/grid/voltage1, espaltherma/grid/voltage2 and espaltherma/grid/voltage3. You can choose your own topics if you want, but the must be available in the espaltherma topic.
When you don’t have a 3-phase system, please publish your voltage to 1 topic, but enter it on all 3 lines.
When you’re satisfied with the topics, press Save to store them and Done to leave the app’s settings. The app will immediately start using the values that are published, as long as they are within the 207-253 Volt range.

Sending grid voltages from Homey to your MQTT broker

To publish your grid voltages to your MQTT broker (when they’re available in Homey—for example via the Homey Energy Dongle), you first need an app that can send data to an MQTT broker. If you don’t have one installed yet, go to the Homey App Store and install MQTT Client by @scanno.

After setting that up, create a Flow to send the grid voltage data to your MQTT broker. See the example below for how to do this:

That’s it! Every 30 seconds the voltage information will be written to the MQTT broker and the Daikin Altherma app will use them to do the Power Usage and Energy Consumption calculations.

How To Extra

Reserved for How to article 3

First test version published

You can find the test version here: https://homey.app/nl-nl/app/com.altherma.mqtt/test

Current test version: 0.0.2

  • Heat Pump device available
  • Water Tank available
  • Estimated Power Usage, default based on a set Grid Voltage
  • Estimated Power Usage, based on external Voltages
  • Estimated Coefficient of Performance (COP)
  • Flow card triggered on errors
  • Flow card triggered on warnings

New test version published

You can find the test version here: Daikin Altherma | Homey

Current test version: 0.0.3

  • Improved setting up the MQTT broker connection

New test version published

You can find the test version here: Daikin Altherma | Homey

Current test version: 0.0.4

  • Added translations
  • Replaced capability icons
  • Improved Power usage and Energy Consumption calculations
  • Improved logging
  • Various minor improvements

Added translations

Added translations to flow cards and devices. Not everything is available yet in all languages as some functionality will be improved. When that’s done, translations will be added

Replaced capability icons

The different temperature capabilities showed the regular temperature icon, Ivo Derksen from Athom created some nice custom icons in addition to the device icons, thanks @Ivo_Derksen!

Improved Power usage and Energy Consumption calculations

After analysing more date I was able to improve the calculations for Power Usage and Energy Consumption. I’m aware it’s not 100% correct yet, this is an ongoing process.

Improved logging

All information from your ESPAltherema is logged and can easily be looked into from your browser. You can easily copy the information into an Excel sheet and use your favourite AI tool to analyse it to see if your Daikin Alhterma is operating optimal.

You can enable and disable the logging in the apps settings. When enabled, the log can be viewed at http://[homey-ip-address]:8008.

The logging has an auto trim function that will keep the log around 10240 lines maximum, but please do disable logging when you’re not using the information. Disable logging will clear the logfile completely.

I am very enthusiastic about the app. Installing and setting up the app was very simple. Installing Visual Studio Code / ESPaltherma was a bit of a challenge, but that also worked out. I created nice graphs in the Homey dashboard. Now the goal is to gain insight into the operation of the heat pump in order to optimize its settings as best as possible. The defrost capability is included in my MQTT message, but I can’t find it in Homey yet. Another suggestion I have is to add water pressure, the temperature of the refrigerant and the temperature of the outdoor heat exchange unit.

Hi @Jan-Willem_Gehrels,

Great to see you experienced installation and configuration as very simple! I did my best to make it as easy as possible and document the procedure in the first few posts of this topic.

As described in the How To: Configure ESPAltherma and the Daikin Altherma app post there are a few labels that are not exposed as Homey capabilities but are used internally, defrost is one of them. In my testing I found that having it as a capability isn’t that useful as defrost is a momentary state which you will very likely miss if you don’t look at it every 5 minutes.
It is however very interesting to use when you want to gain insight into the operation of your heat pump so it is included in the logging.

May I suggest you enable the Turn on debug logging in the app’s settings. Let it run for a while and then open a browser and navigate to http://[homey-ip-address]:8008 to see the log.
Easiest way to analyse the information is to copy everything, paste it into Excel and use the Data to columns function to make the information better readable. And now for the easy part, go to ChatGPT, drop the file in it and ask to analyse it!
I’ve done that multiple times while developing, mainly to help me check my code but I found out I got really good information on the operation of my heat pump.

While doing all this testing I’ve added and also removed again many parameters ESPAltherma could provide and found out the information that’s included now is sufficient to get a good analyses.
Then again, I can see if I can add the Water Pressure, Refrigerant Temperature and Heat Exchange temperature. Could you post the labels that provide this information? (There’s quite a few, don’t want to waste time on adding wrong labels :wink: )

Next to the labels that are logged for analysis, there are also labels that are available to inform you when something may be wrong, such as the error labels for example. For these labels I’ve included flow cards to make them visible, see Additional flow cards on how to set this up.

Hope this helps! If you have any more questions or remarks, just post them here!

Thanks for creating and sharing this great app, installation was easy and I am using the app for over a week now.

I just wanted to share that for my single phase machine the electrical power consumption is calculated too high. The app’s power consumption may be accurate for three phase machines, but for my single phase machine (and perhaps for other single phase machines) it results in too high numbers.

I have a 8 kW EBLA heat pump, which is (as mentioned) a single phase machine. It does have an additional second phase connection for the so-called bakup heater for the heat pump itself and also an additional third phase connection for the booster heater (in the domestic hot water tank). Under normal conditions however, the first single phase is almost always enough and the other two phases are almost never used.

I also have a Shelly three phase power meter, dedicated to the heat pump. So I can cross-check the app with the Shelly data. From this I think I can draw the conclusion that in my case the power consumption is almost a consistent factor 2.7 too high. I assume this is a combination of a factor 3 (for 3 phases) multiplied by a factor 0.9 (power factor) resulting in 2.7.

For calculation of the COP, I am now using a flow that combines data from the app (waterflow and delta-T) with the measured power consumption from the Shelly power meter. This seems to give me good results.

Hi Bart,

Great you found the app and are using it. I’ve written the app for my particular heatpump which is has a 3-phase connecting so I’ll have to look into the internal calculations for 1-phase connected heatpumps.
I’d like to look into if I can detect the connection method from ESPAltherma information, could you let me know what label definition file you’re using so I can compare it to the one I’m using for my Daikin. If I can’t detect it I’ll add a setting for it in the device settings.

New test version published

You can find the test version here: Daikin Altherma | Homey

Current test version: 0.0.5

• Improved error logging
• added 1-phase power calculations (experimental)

I’ve added a setting to select between a 1-phase and 3-phase configuration, default will be 3-phase. This is experimental, please post results here!

Thanks for the improvement, really appreciated. I have selected the single phase setting a few days back, and am sharing a few observations. See the graph below made from Homey data downloaded to excel. Last night the Daikin heat pump has been running constantly to provide warm water for my floor heating. Beeclear is the measured total power consumption of my house (purple). Shelly is the measured total power to the Daikin heat pump (dark blue). Difference between purple and dark blue is a few hundred Watt caused by the rest of the consumers in the house. The Daikin altherma app calculated power consumption goes nicely up and down with the Shelly. There is a however still a constant factor of about 1.38 difference (red and dark blue). I have no clue what could cause this difference. The title of the graph says kWh which is wrong :face_with_peeking_eye: The power should obviously be Watt.

New test version published

You can find the test version here: Daikin Altherma | Homey

Current test version: 0.0.6

• Improved 1-phase power calculations (experimental)

@Lotus1971 Thanks for testing and your report! For single‑phase systems the app was using the calculation that works well for three‑phase systems, but needed a correction factor for 1-phase systems, which I included in this new version. Please test this and let me know the results, thanks!

Thanks for the update. The power calculated by the app is now really close to the data from my Shelly power meter! See graph below from data last night. For me personally this is accurate enough. :slightly_smiling_face:

It appears that (at least for my heatpump and Shelly power meter) there is a constant small remaining difference in the power numbers of about 30-50 watt. I am guessing this is the power consumed by the heat pump electronics and the fan. Or it could be that the Shelly power meter is giving a slightly too high number. See below graph that was made by adding 40W to the power given by the app. The fit is then (arguably) a bit better than before.

Note however that there is a certain “resolution” in the Daikin (or ESP module) data of about 60-70 Watt, so we are talking about a difference in the order of magnitude roughly half the resolution of the data! And this “constant” of 40 Watt may be different for different heat pump models or it may be caused by my Shelly power meter.

Hi Bart,

Thanks for the report, graph is looking a lot better now!
You’re right about the difference you still see, that will be all energy that’s consumed by the heatpump which is not related to actual heating, so control electronics, fans, MMI Controller (if yours has one) wifi etc.

I’m not yet sure how I want to handle this, I think the best solution would be to use a (global) default value and add it to the settings to override when a user can determine the actual value.

I want to use the same method for the usage of the Backup Heaters.
The BUH values I’ve implemented right now are BUH1 at 3000W and BUH2 at 6000W, do you know the values for your heat pump?

Could you check one thing for me, what’s the FREQUENCY value in your my_setup.h file in ESPAltherma?

I’ve mine set et 30000 milliseconds:

That gives me a smooth resolution:

Hi,

Both backup heaters are 3kW. In my installation they are both connected to a single phase each with a dedicated 16A circuit breaker each. So I know for sure they can’t be more than 3kW.

My frequency is also the default value of 30000 ms.

The approach for a default value (with option to override) for the non-heating related power consumed seems like the correct way to go.

Thanks for all the good work!