It used to work, ill check it out.
Can you create a ticket?
Thanks!
anyone else finding simple logs on homeys timeline are doubled
Simple Log Dashboard Widget
Certain Dashboard widgets and examples made me think of creating a Simple Log widget.
Here’s a how-to.
(Thanks to To_Lou for the initial HTML code)
Example:

→ scrollable ^ v < >
→ zoomable (pinch & spread fingers)
→ log data is selectable, to copy it
- Install a web server app on Homey, like Micro Web Server which is used by me
- Save the HTML code as
.htmlfile:
Click for the HTML Code
<!-- Save as html file and open it to view the logs -->
<!DOCTYPE html>
<html>
<head>
	<title>Homey1 log</title> <!-- (optional) Replace example title with your own -->
    <style>
        table, th, td
        {
            border: solid 1px #ddd;
            border-collapse: collapse;
            padding: 2px 3px;
            font-family: verdana;
            color: #fff; <!-- change font color-->
            font-size: 40px;
            text-align: left;
         }
            tr:nth-child(even) {
            background-color: #393939; <!-- change background color of even rows -->
            }
            tr:nth-child(odd) {
            background-color: #101010; <!-- change background color of odd rows -->
            }
            tr:hover {
            background-color: #874444; <!-- change background color of mouse hovering -->
            }
        th {
            font-weight: bold;
            font-family: verdana;
            text-align: left;
        }
    </style>
</head>
<body>

	<p style="font-size:40px;" id="showData"></p>

</body>

<script>

    // the json data.

const url = "http://192.168.x.x/api/app/nl.nielsdeklerk.log/"; <!-- Replace IP address with your Homey's IP address-->

async function FetchData() {
  const response = await fetch(url);
  const data = await response.text();
  const string = "["+data+"]";
  const myJSON = JSON.parse(string);
  const JSONtable = myJSON[0].logs;

  response.ok;     // => false
  response.status; // => 404

  return JSONtable;
}

FetchData().then(JSONtable => {
  JSONtable; // => 'Page not found'

    // Extract value from table header.

    let col = [];
    for (let i = 0; i < JSONtable.length; i++) {
      for (let key in JSONtable[i]) {
        if (col.indexOf(key) === -1) {
          col.push(key);
        }
      }
    }

    // Create table.
    const table = document.createElement("table");

    // Create table header row using the extracted headers above.
    let tr = table.insertRow(-1);                   // table row.

    for (let i = 0; i < col.length; i++) {
      let th = document.createElement("th");      // table header.
      th.innerHTML = col[i];
      tr.appendChild(th);
    }

    // add json data to the table as rows.
    for (let i = 0; i < JSONtable.length; i++) {

      tr = table.insertRow(-1);

      for (let j = 0; j < col.length; j++) {
        let tabCell = tr.insertCell(-1);
        tabCell.innerHTML = JSONtable[i][col[j]];
      }
    }

    // Now, add the newly created table with json data, to a container.
    const divShowData = document.getElementById('showData');
    divShowData.innerHTML = "";
    divShowData.appendChild(table);

	});

</script>
</html>
- Edit the HTML file, to replace the example IP address with the IP address of your Homey ( @ around line 42)
- Optionally you can adjust several colors, as explained in the code
- Now check if all’s OK, by opening the HTML file in a browser. It takes a while for the logs to appear, be patient.
- Create an FTP connection to Homey’s new web server ftp://192.168.x.x:5081/
- Upload the HTML file
- Open the Homey Dashboard and add a “Web” widget
- Enter this URL, and replace the example IP address with your Homey’s IP address, and html file name:
http://192.168.x.x:5080/the_name_of_your_html_file.html
Example settings:
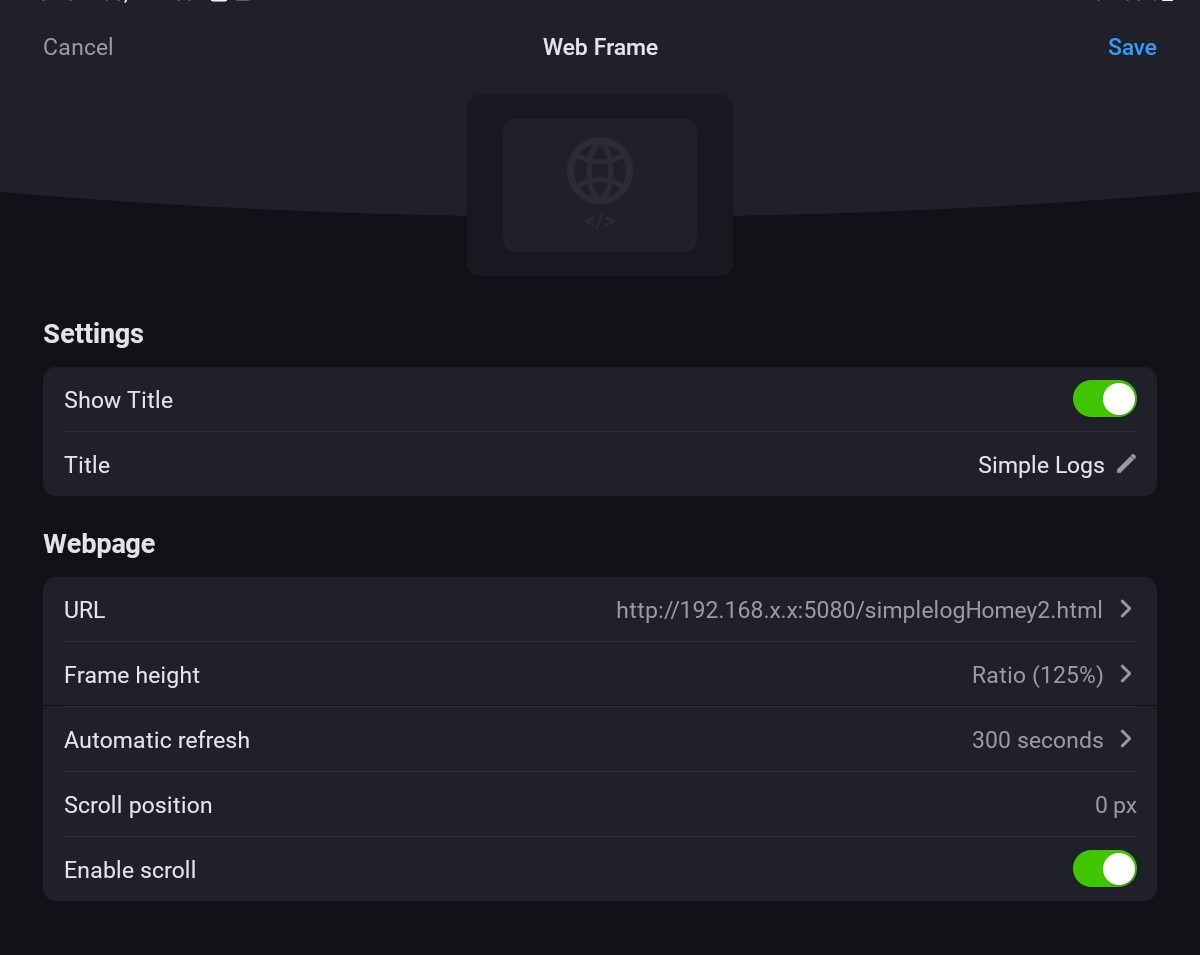
I would enable “auto refresh” every x seconds
10. Save, and check if the logs appear on your dashboard!
Thank you for sharing!
This is an easy to quickly view my logging without the struggle into the app.
Is the auto refresh running in the background or only when the dashboard is open?
YW!
I used the HTML file ‘trick’ already to view my logs in a convienient way.
No clue. I asssume dashboard activities to stop when it’s unfocused.
But bg refreshes aren’t necessary, because web frames get freshly loaded when the app with dashboard comes (back) in focus (just checked on that).
Hi @Arie_J_Godschalk my simple log app keeps crashing after opening the loginfo via ‘app instellingen’ (which shows an empty log)
I use version v3.0.33. Any clue?
Edit: deleting and reinstalling solved the issue
After installing the new HP2023 version (v12.3.3), I have the same problems as @Walter_vande_kerkhof .
The only difference is that even a new installation of the Simple(Sys)Log App does not help.
Tested with the live AND test version of the app.

And i am guessing you do have BLL installed?


Got an error trying to display the log in the app too. An app restart helped. Recording was working.
Homey pro with 12.3.3, Sys-log: 3.0.33, BLL: 3.4.13


Hello. I’m brand new to using this app and i have a question. What is the difference between the timeline and the log? I understand that the log is the list of events that i find under the settings of the app but what is the timeline? Where can i find it?


OK, i see. Thanks for your help.
I am using the Simple (sys) logging to log each 15 minutes the production of my SolarEdge inverters. Currently in the logging each 15 minutes two rows are added: one with the values I would like to retreive and one indicating: “Error: uri_disabled”. Tried to find the cause of this error and found that this error does not appear anymore if I allow the app to put all values (so each 15 minutes) in the timeline, but I want to keep the timeline “clean”. E.g. information wrt updated apps. Is there another way to “get rid” of the “Error: uri_disabled” rows? If so, how? Thanks in advance for your suggestion(s).
Best regards, Jan
I can’t picture what you mean.
Do you mean two log lines get added, instead of one, when you start just one log card with your flow?
Not all Log cards also write to the timeline, you’d use one of these cards:

I never saw “Error: uri_disabled” in my logs by the way.
Did you perhaps connect the error output from the card which sends the value to the same logcard?
If yes, use a separate logcard for that.
Please show that part of your flow!
Which app? Which values?


Hi Peter. Thanks for your questions. Apparently I was just using the wrong logcard. I replaced it and now everything (seems to) work fine. Best regards, Jan
Nice to hear!
Aahh it shows the error is logged by Simple Log itself.

Because you used the log card “write to timeline and log”, I think the Simple Log app isn’t allowed to write the timeline. Because we can disable certain items via timeline settings, I guess you disabled the Simple Log toggle, which returns an error each time you want Simple Log to write to the timeline:

Hint: you can log one total value by using this calculation:
{{ [ tag of Energy yield (total) A ] + [ tag of Energy yield (total) B ] }}
This might be clearer though:

